Showing posts with label dessert. Show all posts

Thursday, 9 August 2018

Quinces

Hello...hello....hello. It's probably an echo chamber in here. Such an incredibly long time since I even looked at my blog let alone posted anything.

There has been lots of changes here. The biggest being I moved to the city! No more country life for me. I do miss my friends but there are other options to see them then living there. I've been here in the city for 18 months now! It's amazes me when I think about it. Seems like just yesterday that I packed everything up and moved on down. People ask me if I'll ever go back...my answer is a rapid "no". I love living in the city. So much to do and so many places to go. If I do get to a point where I decide that city life isn't for me there is a whole world to places to go, although backwards isn't one of them.

Besides all the places to go and things to do I so love the access that I have to ingredients down here. All those recipes I used to pour over and think "if only I could get the ingredients", well I can now. So many options. Near where I work there is a most wonderful fruit, veg and deli place. I will rave over it regularly. Such a wide range of produce and other things. Some cheap, some not so. I do have access to some other cheap fruit & veg places plus butchers nearer to where I live. Although I admit to thinking the other night that with the meat in these butchers being so cheap, and it really is, how much are the farmers getting screwed down. We are in the midst of a dreadful drought and having grown up on the land it suddenly occurred to me that cheap meat, whilst good for my pocket, effects those down the line. I'm not sure what the answer is though. Now I'm on a stricter budget every little saving helps. Plus it does mean that I am still eating meat reasonably regularly. If I was relying on other butchers or the supermarket there would not be much of it on my table. Not that that would be a terrible thing.

I have no idea if I've mentioned quinces here on the blog before. I love quince. When I was a kid we lived on a farm that had some old quince trees. We had to compete with the codling moth for the fruit so we didn't always get a lot of it. I don't really remember what I mum used to do with them either. I know there was jam, perhaps pie. I do remember them being really good. Not that you can eat them uncooked. Perhaps you could...I wouldn't recommend it though. I had bought them at supermarkets occasionally but they were expensive. I found them here, first at Harris Farmm market where I have also bought a lot of produce but mainly from the deli. I've made a number of things from them.

First I used this Stephanie Alexander recipe for Baked Quinces. It was excellent. So very delicious with some yoghurt as a dessert. I also added them as a sweetener to my morning porridge. They would probably be fabulous with an oozy rice pudding. I will admit to not being overly keen on the skin being left on. Whilst you can eat it, I found it didn't soften too much. I guess that was part of the idea to hold the quince halves together but I'd most likely peel them if doing the recipe again. They were sweet and delicious though.
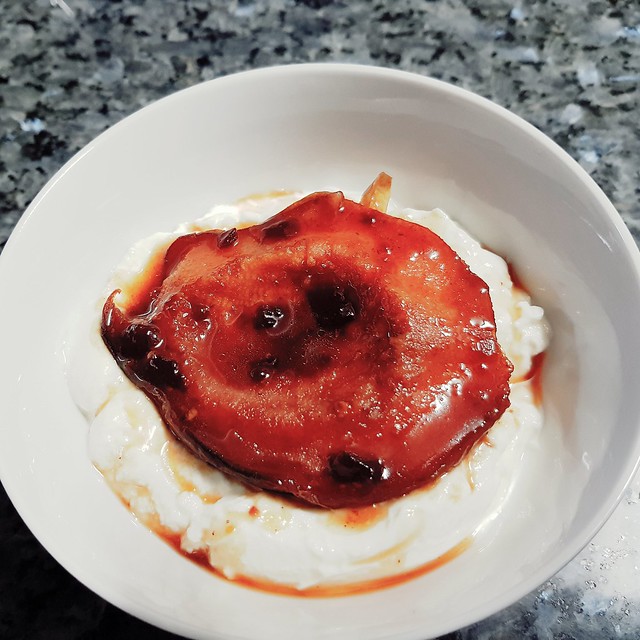
Baked quince with yoghurt


My next foray with quince was Roast Pork with Quinces, Honey & Red Wine. Now, this was good but I'd definitely make some changes to the process if making again. All of the elements were wonderful, although I replaced the parsnips with carrots and chokos. I found that the quince and vegetables ended up a tad over cooked and, s you can see in my picture, almost black with the sauce having excessively reduced down I will admit that I have a very big roasting pan and it would probably been beneficial to be in something smaller. However, I think it would have been best do the pork at high heat and then add the quince and liquid following that. I would also wait a little longer before adding the other veg. Although parsnips are quite a bit more dense than carrot and chokos so that could be one of the reasons for the slight over cooking. It was delicious but there are definitely changes that could be made to make it better.
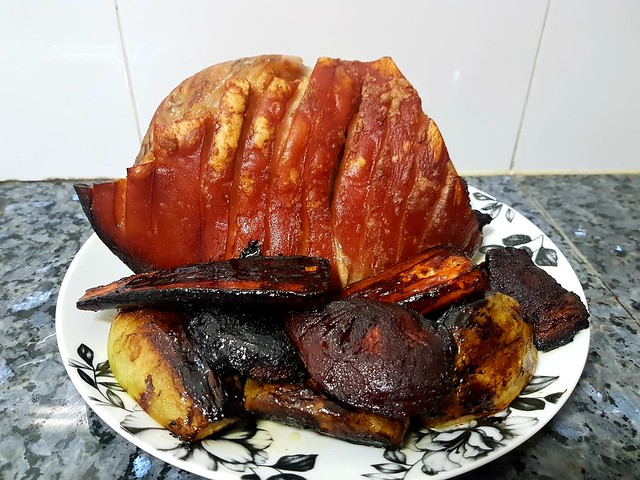
Roast pork with quince, honey & red wine


My pièce de résistance with my quinces, although I do have one left, was this Quince Upside Down cake. O.M.G. Amazing. It is a long process. I mean there is the poaching of the quince. The only change I made to the poaching process was that I added a cartouche over the fruit before adding the plate to the top and putting the lid on for part of the cooking too. I didn't like that the cores were left in. I would remove them next time. They were just a pain trying to remove them after they had been poached & cooled. Sometimes quince cores can be difficult to remove and have a hard surrounding to them that really needs to be removed and it was hard since the rest of the fruit was softened. I was very concerned when I was putting the cake batter in the tin and throughout baking that there was too much of the syrup in the pan. I mean it was coming up around the cake batter. However it turned out perfectly. I was surprised but very pleased. I hate to waste ingredients. I work in a larger office now and they are very grateful for any baking contributions that I make to the office. I am happy because I get to bake and I don't have to eat it. Most people were convince there was ginger in the cake. Perhaps the combination of fresh grated nutmeg and the cloves threw them off. I'm not sure. I got some raves for it. Plus I have some left over poached quince. I had some one night with a drizzle of cream for dessert. It was lovely. I'm not exactly sure what I will do with the rest of the left overs...ice cream maybe, rice pudding perhaps. I would highly recommend making this if you can get your hands on some quinces.
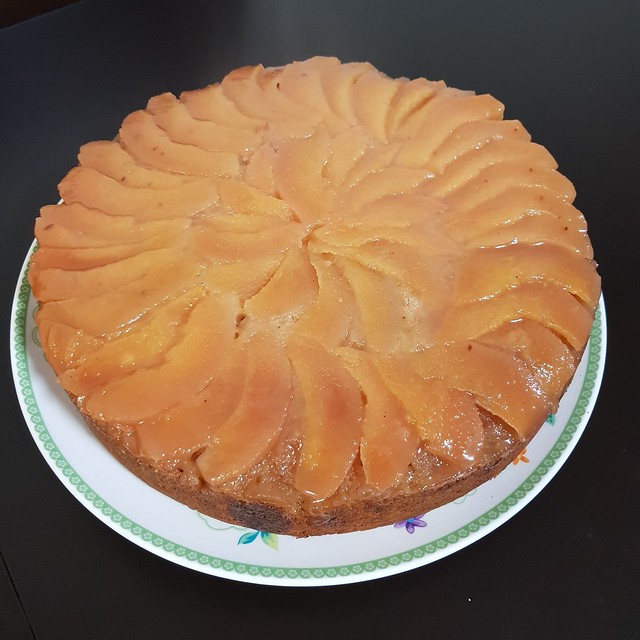
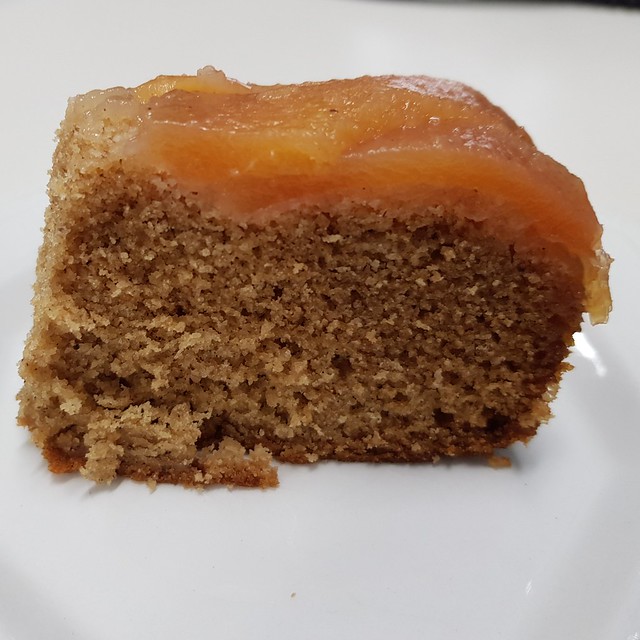
Quince upside down cake


Quince upside down cake

Sunday, 7 July 2013

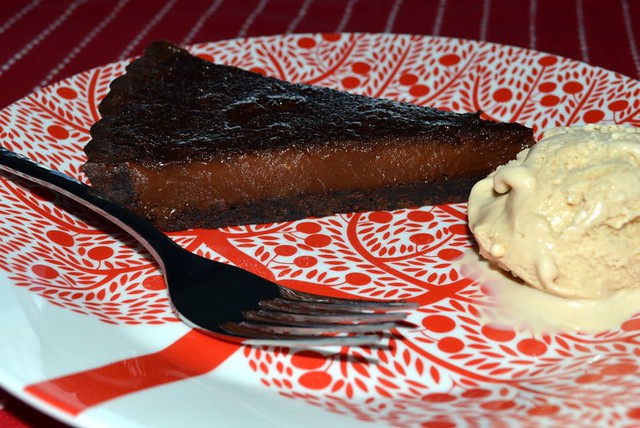
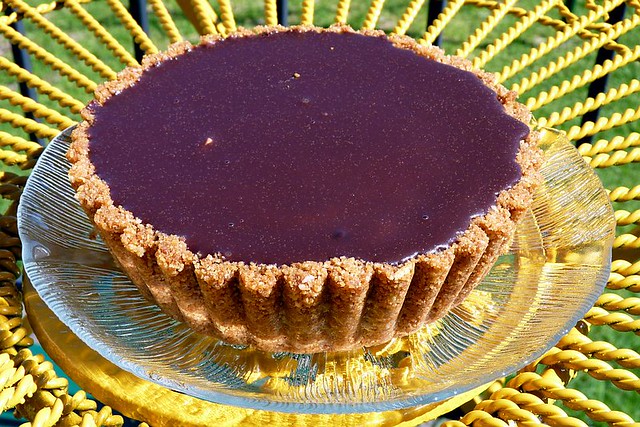
July 2013 - Chocolate Chilli Tart

I am not going to pfaff about with what is on the inside of the front cover. There are other things to make, and I may get to those later, but to start with I just could not go past the cover recipe. I have often lamented about the glorious cover recipes with desserts on the front and wanting to make them but no one to cook for. It hasn't changed but this time around I didn't care I decided that I would just make it. I have frozen a few slices to see if that will work. I have some to go to the office and finally some to go to a friend. Although, my friend isn't keen on chilli so I am not sure how she is going to go I guess her hubby will get it all if it is too strong for her. I will suggest freezing if it has too much of a kick for her. I had thought about reducing the amount of chilli in the recipe but I really wanted to make it as it. 

Talking about that, I didn't make it completely according to the recipe as I didn't make the chilli syrup to drizzle over it. Well, that is not exactly true. I did try to make the syrup but something went horribly wrong. I wasn't really sure what it was initially. I had a jar of glucose syrup in the cupboard, which I admit, had been there a while. After I ended up with a weird lumpy mess I had a look at the jar and it was use by 1996! I knew it had been around a while but not quite that long. After tasting the tart I don't think that the syrup was really necessary anyway.

I made this recipe over two days starting with the dulce de leche ice cream that goes with this and finishing with the tart. It wasn't difficult it was just a bit time consuming. I made everything from scratch, so it added a bit to the time. I will post the ice cream recipe in a different post.

I will start out with my recipe for the dark chocolate pastry I used. I cannot get the recommended Careme pastry so I made my own.

Dark Chocolate pastry

1 1/4 c flour
1/3 c dark cocoa (I used Plaistowe from the supermarket)
1/4 c caster sugar
125 g cold butter, chopped
1 egg
1 tsp vinegar
1 - 2 tbsp water

Add flour, cocoa and sugar to Thermomix bowl (or food processor) mix 5 sec on sp 4.
Add butter 10 sec on sp 4 or until it resembles breadcrumbs.
Whisk together egg, vinegar and 1 tbsp water. Add to flour mixture, knead closed lid position for 30 sec, checking to see if further liquid required. I did add the extra 1 tbsp water.
Wrap in plastic, set aside. If hot place in fridge, if cold on the counter will be fine.
Line 23cm tart tin, place in freezer for 10 min. Remove and fill with baking paper and pie weights (or rice) and bake for 10 minutes at 180 C, then remove weights and bake for a further 10 minutes. 

Chocolate Chilli Tart
adapted from Valli Little

300 ml thickened cream
150 ml pure cream 
2 tbsp caster sugar
200 g dark chocolate, finely chopped
100 g milk chocolate, finely chopped 
Seeds of 10 cardamom pods, ground
1/2 tsp chilli powder
3 eggs, lightly beaten

Bring creams & sugar to a simmer then remove from heat and add chocolate, cardamom & chilli and stir until smooth. Cool a bit and then add eggs. Pour into tart case and bake for 20 -25 min. Cool in pan. 

I had enough chocolate custard for two ramekins and baked them too. The hit of chilli seemed stronger in them than the tart. 


Sunday, 27 January 2013

Cherry & red wine ice cream

I made this a month ago now. I really should have blogged it before but at least it is getting done now. During the Christmas break I did some day trips. One of them involved going on a bit of a foodie tour around one of the regions nearby. There is a large amount of stone fruits available in the area. I bought nectarines, apricots and blood plums as well as 2.5 kg of cherries. I did a number of things with them including just eating a large amount of them. The first thing I did though was to make this cherry & red wine ice cream. 

I don't normally make custard based ice creams. I find them a bit rich for me. I tend to make a half cream/half milk ice cream. It is a bit harder and not quite as smooth but I like it. Not saying this wasn't good. It was fabulous but I found it very rich even when eating just a small amount. Make sure that you use a good wine as the flavour does come through. If you couldn't sit and drink the wine don't use it. Actually, that applies for all cooking, especially when they involve a large amount of wine. I bought a bottle of one of my favourite wines, Wolf Blass Silver Label Shiraz. Actually, my favourite Wolf Blass is the Grey Label but I while I was willing to sacrifice half a cup of the silver I am not willing to sacrifice half a cup of grey for anything. I haven't tried the black or platinum ranges, perhaps one day, at this stage the grey is at the top of my price range. 

This was an easy ice cream to make, most are really. It also let me use my Kitchen Aid ice cream attachment again. I haven't really used it a lot but it does make good ice cream and sorbet when I have used it. I am planning to try frozen yoghurt in it some time soon. The cherry flavour wasn't all that strong in this. I actually think that this would have been wonderful with some of the sweet strawberries that I had purchased while on my trip.

Cherry & red wine ice cream 

750 grams cherries, pitted
1/2 c caster sugar, plus 2 tbsp extra
125ml shiraz, (a good one)
2 star anise
1 1/2 c cream
6 egg yolks
1/2 c milk

Combine the cherries, sugar, wine and star anise in a pan over low heat stir to dissolve the sugar bring to the boil, turn down to a simmer and cover with a lid leave for 5 minutes. Remove the lid and simmer until cherries are soft and liquid is syrupy approx. 15 minutes. Puree and strain. Cool.

Bring the cream just to a boil. Whisk egg yolks and extra sugar to combine, pour over the cream and return to a clean pan, on a low heat stir until the mix coats the back of a wooden spoon, make sure to keep stirring, it can easily turn to scrambled eggs if you take your eye off it. 

Strain through a fine sieve into cherry puree with milk and mix thoroughly. Cool and then churn in an ice cream machine.  


Thursday, 27 December 2012

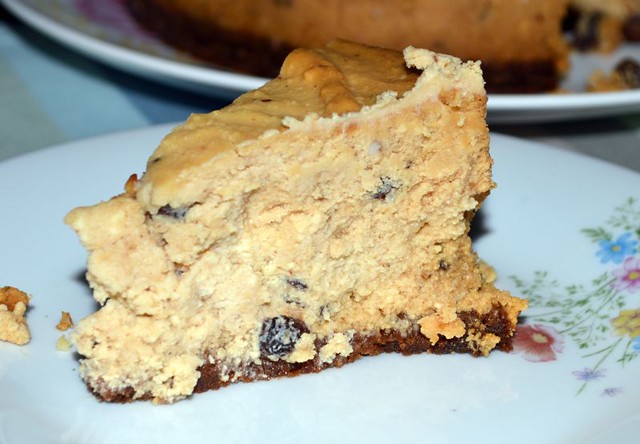
Fruit mince cheesecake

Okay, so this one was a bit of a disaster but I know what I did wrong and I am sure it would be fantastic if that was rectified.

I had a jar of fruit mince in the cupboard that I had been given. I was part of a hamper received by a friend from her employer and she said that she wouldn't use it. I decided that it should be used up and I thought about making a cheesecake for dessert on Christmas. I ended up not taking it to the dinner at my uncle's as I had something else to take. It was a good thing too as it was almost inedible. In fact the after the one small slice that I had last night the rest ended up in the bin.

My biggest error in this was not remembering just how strong fruit mince is. The other thing was that I had never used bought fruit mince before, only ever my own. I, stupidly, used the whole jar in the cheesecake when in reality I should have only used probably a 1/4 of it. I would say a couple of tablespoons. To be honest, I only mixed in half the jar to start with but the flavour didn't seem that strong so I put the rest in. Oh, but it intensified during the cooking process.

The cheesecake recipe is one that I have made a number of times before. It comes from the October 2003 issue of Delicious magazine. It is a low fat version that uses ricotta and low fat cream cheese. I have never had a fail with the recipe. The original recipe says to cook in 3 10 cm springform tins. I do have them but the recipe also says that you can use a 20 cm tin which I do all the time. The low fat is achieved by using ricotta and low fat cream cheese in it. The only problem I have with the recipe is that every time I make it I forget that the recipe for the base has way too much butter in it and I end up with it leaking butter all over the oven. I don't like to mark my delicious magazines but I might have to for this recipe.

Low-fat Cheesecake

150g plain sweet biscuits, crushed (I like to use gingernuts)
40 g butter (original is 70 g)
500 g ricotta
250 g light cream cheese
1/2 c (110 g) caster sugar
2 tsp lemon zest
2 tbsp lemon juice
1 egg (I put the extra yolk in)
1 egg white

Preheat oven to 160 C.
Line base of 20 cm springform tin.
Mix biscuits and butter. Press into tin and refrigerate until needed.
Beat ricotta, cream cheese, sugar, zest, juice and egg until smooth.
Beat egg white to soft peaks and fold into ricotta mix.
Pour over base.
Bake for 40 - 45 minutes.
Refrigerate overnight.


Thursday, 22 November 2012

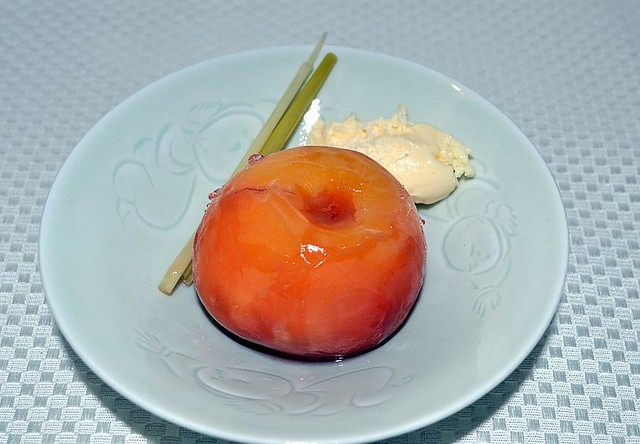
November 2012 - Poached peaches with lemongrass

So I finally got around making something from this issue. I have lost my cooking mojo a bit. It has all just been food for sustenance rather than presentable food. I really wanted to make the tarts on the cover but I just didn't get around to it plus no one but me to eat them.

I did make a lime & herb marinated chicken but it ended up being completely different than the recipe in the magazine so decided that I couldn't use that one. 

There is a fregola salad recipe that I was considering making but for some reason I just couldn't seem to get all the ingredients together at once. I also do not have fregola but I thought that I might be able to use pearl couscous. 

In the end, out of frustration at having not made something, I decided to make Jamie Oliver's poached peaches with lemongrass. They were very good, nice and refreshing. I would probably bash the lemongrass around before adding it in. I reduced the poaching liquid down to a syrup to serve with them. I have also used them chopped up on my breakfast cereal. 


Sunday, 22 July 2012

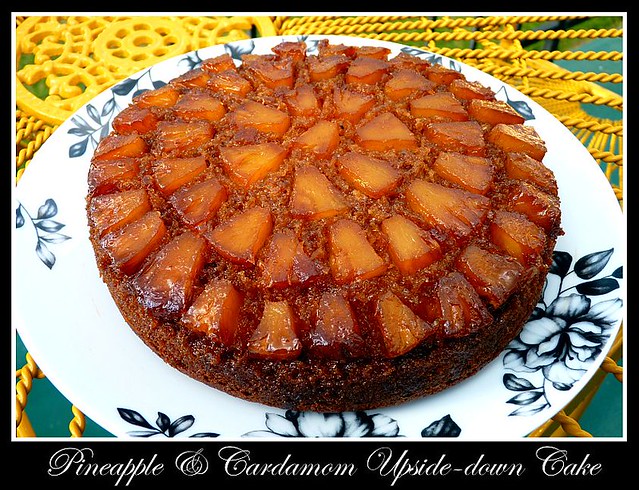
Pineapple & Cardamom Upside Down Cake

I love to cook and I love to bake. That is probably obvious since I have a foodie blog. While I get a lot of chance to cook meals, hey everyone's got to eat, baking is a different story. Living on my own means that I have to eat what I cook. There is only so many cakes, muffins, slices or desserts that one woman can eat. So whenever I get invited to dinner to a friend's house I always take something with me. This was one of those times. 

I have actually made this cake before and think that it is just wonderful. I find that upside down cakes can have a tendency to be too sweet. However the cardamom in this one seems to cut through the sweetness wonderfully. Although I will admit that I have reduced the sugar in both the topping and the cake. My friends and their children just loved it. I love it too, so much so that I didn't leave the leftovers but brought them home for me. Lol Although after feeding 3 adults and 3 children there wasn't that much left. 

Pineapple & Cardamom Upside Down Cake
  • 70g brown sugar
  • 40g soft, unsalted butter
  • 1 tin pineapple piece in natural juice, drained (you wont need the whole tin so keep the juice)
  • 150g (1 cup) self-raising flour
  • 1/4 tsp bicarbonate of soda
  • 1 tsp ground cardamom
  • 80g caster sugar
  • 2 tbsp butter
  • 1 tbsp golden syrup
  • 2 large eggs
  • 1/2 cup milk
Combine brown sugar and butter in a heavy-based saucepan and stir over low heat until well combined and smooth. Remove from heat and pour into a well-greased, round, 20cm cake tin, spreading evenly. Arrange pineapple pieces on top of brown sugar mixture.
Sift flour, bicarbonate of soda and cardamom into a mixing bowl. Add caster sugar, stir and make a well in the centre. Melt butter with golden syrup and cool slightly. Pour into the well with eggs and milk. Beat thoroughly with a wooden spoon. Pour mixture over pineapple pieces and bake at 160 C for about 45minutes - 1 hour or until a cake skewer inserted in the centre comes out clean. Cover with foil if cake browns before it is cooked through.
Stand in tin for 5 minutes before turning out onto a plate.


Tuesday, 17 July 2012

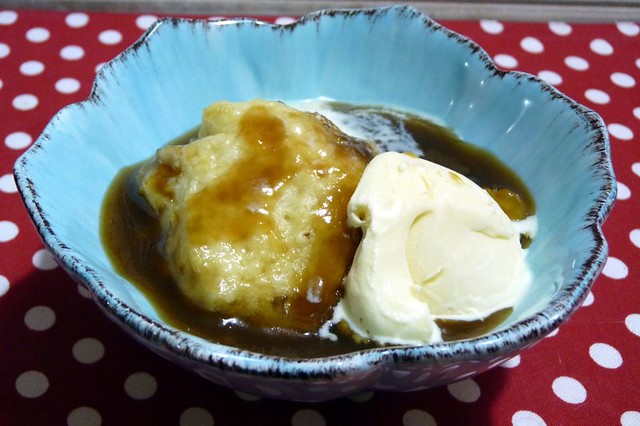
Caramel Dumplings

There are some recipes that are definitely winter recipes. I always make more stews, soups, and roasts in the winter. Mulled wine and mulled cider are something that comes to mind as winter recipes. Plenty of dessert recipes are winter recipes as well. Puddings, pies, crumbles, poached or baked pears and baked apples are all winter desserts as far as I am concerned. 

This is a winter recipes. I have been making this since I was about 10 or 12 years old. The original recipe was from and old Women's Weekly recipe but I have changed it a little bit over the years. Mainly reduced the sugar as it was a bit sweet for me. I also reduced the flour a bit as I always found that it was a bit dry. I always end up with too much of the dumpling mixture left over anyway. This would have to be one of the desserts that I associate with a specific time of year and it really is a good one. 

Caramel Dumplings 

1 c flour 
2 tsp baking powder 
pinch salt
1/3 c caster sugar
30 g butter
1 tsp vanilla 
1/3 c milk 

Sauce:

30 g butter 
1 c brown sugar
pinch salt
1 1/4 c water 

Combine flour, baking powder salt and sugar. Rub in butter until it resembles breadcrumbs.
Combine milk and vanilla an then add to flour and mix until just combined, if it is a bit dry add a little more milk.
In a saucepan with a tight fitting lid, melt the butter.  Add brown sugar, salt and water and bring to the boil. 
Drop spoonfuls of the dumpling mixture into the sauce and then place the lid on and simmer for 20 minutes. 
Serve with cream or ice cream.


Sunday, 4 March 2012

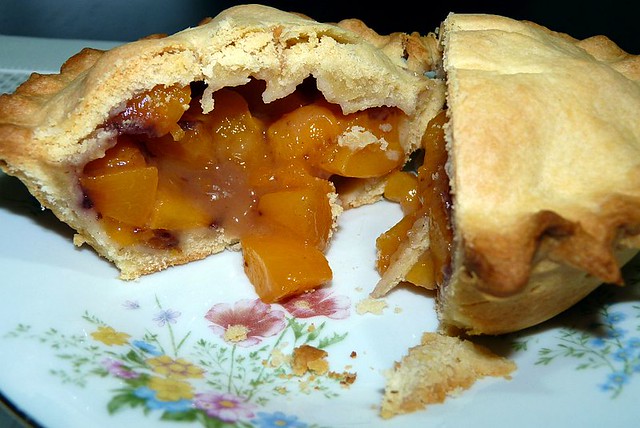
Peach Pie

I was given some lovely peaches by a neighbour last week. I had used some to make a peach chutney, that I will write about soon, but the rest were sitting in the fruit bowl and I was starting to worry that they would go bad. While I do like peaches, they are not my favourite stone fruit to just grab and eat, that prize goes to nectarines. This afternoon I decided to use them up I would make a peach pie. I wasn't sure that I had enough fruit to make a full pie so decided to go with some individual pies. I pulled out my Mum's recipe book and used her recipe being sure it wouldn't fail me and nor did it. They turned out extremely well. Just the right amount of sweetness. They could have used a touch more spice though. I think perhaps nutmeg instead of cinnamon. Excellent way to use up the peaches I think. 

Peach Pie

Crust: 

2 cups plain flour
2 tbsp caster sugar 
160 g butter, diced 
1 egg. lightly whisked
1 tbsp vinegar
water to make 2/3 c 

Add flour, caster sugar and butter to food processor. Pulse until mixture resembles breadcrumbs. Combine egg and vinegar and add water to make up 2/3 cup. With the motor running add about 3/4 of the liquid, adding more if necessary, until it comes together. Wrap in glad wrap and chill in the fridge for 20 minutes. 
Break off small pieces roll out to line 4 individual pie pans, remembering that you need enough for lids as well.

Filling: 

6 peaches, peeled & diced 
1/3 - 1/2 c sugar (depending on sweetness of peaches) 
1 1/2 tbsp plain flour
1/4 tsp cinnamon or nutmeg

Pre-heat oven to 180 C.
Mix sugar, flour and spice together and then pour over peaches and stir to coat. 
Divide filling evenly between pie tins.
Roll out the remaining dough for the tops of the pies and place on top. Crimp edges as desired to enclose. Make two cuts in the top of the pies and then place on a baking tray and bake for 35 - 40 minutes. Turning the tray halfway through to brown the pies evenly. 
Serve with vanilla ice cream. 


Thursday, 19 January 2012

Chocolate Caramel Cheesecake

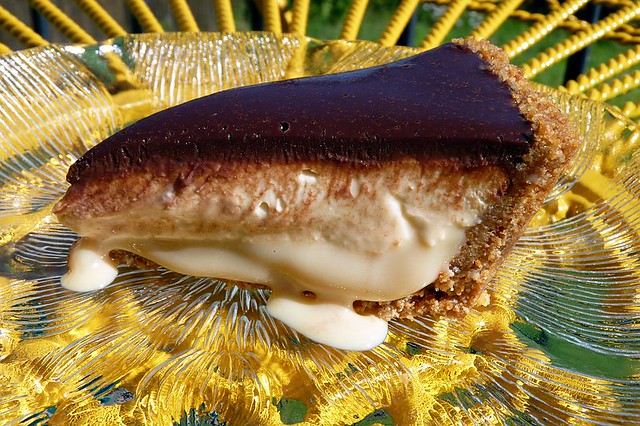
Over on Taste forums a week or so ago someone put out a request for a Mars Bar cheesecake. There are plenty of recipes around for mars bar cheesecake, most of which involve chopping up and/or melting Mars bars into a cheesecake mix. However that wasn't what this person was looking for. Described as having discrete layers of caramel, cheesecake and chocolate all in a biscuit base so, looking for something creative to do, I thought I would give it a shot to come up with something. 

The caramel layer was easy enough, I just boiled a can of sweetened condensed milk. Although unfortunately I didn't boil it quite long enough so it is a touch runny. The chocolate layer was simple enough, a softish ganache made from equal quantities of cream and dark chocolate. You could make a firmer ganache but I wanted something nice and soft. My main issue was how to make the cheesecake layer "Mars bar-ish". I looked at some chilled cheesecake recipes. I looked up nougat filling recipes wondering if I could combine the two. Discarded most ideas with the thought of them being overly sweet and decided in the end I to go with something really simple. I added a good slug of vanilla extract (paste would have been better but I don't have any at the moment) and used dark brown sugar in the mix instead of white or icing sugar. The result is, if I do say so myself, rather spectacular. It it doesn't quite have the taste of a mars bar, the tang of the cream cheese still there. You could add more sugar if you want, I hedged my bets on that last night when I was making it as I though maybe with the sweetness from the caramel it would be overpowering. For me personally it is perfect but please do it to your own taste. Out of this recipe I made 1 x 15 cm tart and 2 x 6 cm tarts, it would probably fit perfectly into a 20 cm round x 3 cm deep tart tin.

Chocolate Caramel Cheesecake

1 400 g tin sweetened condensed milk (you could also use Top'n'fill)
50 g butter, melted
250 g cream cheese
100 ml double cream (you could used thickened I think)
2 tsp vanilla extract 
3 tbsp dark brown sugar 
100 ml pure cream (you could used thickened)
100 g dark chocolate, finely chopped

Method: 

Simmer tin of sweetened condensed milk in a large pot of water, making sure that the water is at least 2.5 cm over the top of the tin at all times, for 3 - 4 hours. (If you let the water level drop below the tin it can explode, please be VERY careful when doing this, other methods for turning sweetened condensed milk in to caramel are discussed here or here
Finely grind cookies in a processor or you can put them in a bag wrap with a tea towel and beat with a rolling pin or meat mallet. (The rolling pin method is particular good if you are stress or frustrated. LOL) Combine crumbs with melted butter and press firmly into base and sides of a tart tin. Refrigerate for at least 30 minutes. 

Beat cream cheese in a mixer, or by hand, until light and fluffy. Add double cream and beat to combine. Add vanilla and sugar and beat until sugar has dissolved. 

Spread caramel in an even thick layer in the tart tin. (I only used about 2/3 of my tin of caramel). Top with the cheesecake mixture leaving about 1/2 cm space at the top for the chocolate. Refrigerate for at least 1 hour. 

Heat cream in a small saucepan until small bubbles start to form around the edges (just before boiling point). Place chocolate in a glass or ceramic bowl and pour over cream. Whisk continuously until chocolate has melted. Allow to cool slightly and pour over cream cheese layer (I ended up with quite a bit of chocolate left over perhaps try 80g/80ml) and refrigerate for at least 4 hours or overnight. 


Monday, 16 January 2012

Happy 2nd Birthday - Coconut Tres Leches Cake

Happy 2nd birthday to my little blog! I forgot the first birthday last year but I was determined not to forget this year. I am so pleased that I started up blogging. I know that did blog as much last year as I did in my first but I am hoping to do more this year. I am trying to keep on top of my diet this year. I did manage to lose 15 kg last year which I was so very pleased with but I still have plenty more weight to lose. I do refuse, however, to starve and/or seriously deprive myself. I know myself too well and know that if I do those things that I just rebel. So will I hope to have more healthy and lighter recipes on here this year there is still be some desserts and indulgent and luxurious meals too. 
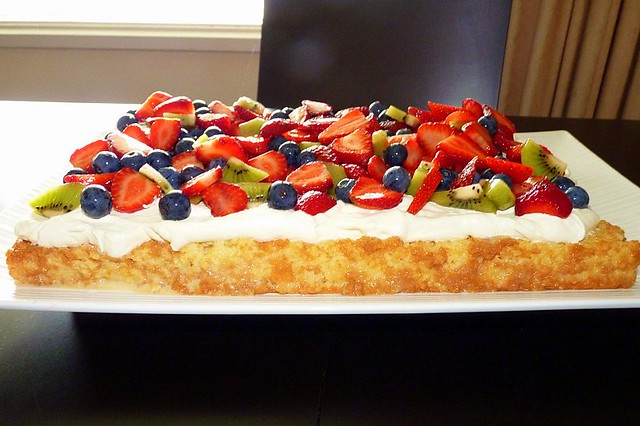
For a birthday you just have to have a lovely dessert and this one is a wonderful one. I had made it before about 3 or 4 years ago and just love it. I had a bbq with friends on the weekend and it was requested that I bring a dessert. Actually I am always requested to bring a dessert, lol. Not that I mind at all, I so love to make desserts. This one was a huge hit, everyone just raved about it and pretty much every one had seconds. The first time I made it I topped it with sliced mango and shaved fresh coconut. I think it was better with the strawberries, blueberries & kiwi fruit.

Coconut Tres Leches Cake

Ingredients

6 eggs, separated
3/4 cup sugar
1 cup plain flour
400 g can sweetened condensed milk
1/2 cup evaporated milk
1/2 cup coconut milk
1 tsp vanilla
1 1/2 cups cream
Fruit to top (eg berries, kiwi fruit, mango, passionfruit)
Shaved coconut (optional)

Method

Heat oven to 160 C (140 C fan-forced).

Grease 32 cm x 22 baking dish.

Beat yolks and sugar on high speed until pale yellow and fluffy.

Whip egg whites to peaks. With rubber spatula, stir about 1/3 of egg whites into yolks and then gently fold in remaining whites.

Sift flour over egg mixture and using a rubber spatula to gently fold in until there are no more white flour streaks being careful not to over mix.

Bake until puffed and golden and the edges pull away from the sides of the pan, 20 to 25 minutes.

Remove from oven and place pan on a wire cooling rack. With a toothpick, poke holes all over the cake. Allow to cool for 15 minutes.

In a jug combine the milks and vanilla and then pour mixture evenly over cake. Continue to cool cake for another 45 more minutes and then cover tightly with plastic wrap and refrigerate overnight.

Turn cake out onto a serving plate, you may need to use a spatula to lift around the edges and then tap on the bottom of the pan, it will eventually come out. (I had the centre of the cake stick but I just lifted it out and stuck it back in place...shhh)

Whip cream and cover cake with it then top with desired fruit and coconut, if using.


Sunday, 20 November 2011

Pumpkin Pie with Vegan Pumpkin Ice Cream

I have spoken of my love of pies before. I know that this all stems from my gramma. She was the best pie maker ever. Plus she grew all of her own fruit so in the summer time it was one glorious pie after another with fresh just of the tree (or bush) fruit. My gramma would also preserve or freeze her fruit as well so that we could have her glorious pies (and other desserts) all year round. 

This pie however, I remember more from Mum. It is Mum's recipe that I have. I always remember begging Mum as a kid to make pumpkin pie but it didn't very often get made so I like to make it a couple of times a year now just to savour it. If you don't tell people that there is pumpkin in it then they would never realise. It is just such a fabulous recipe, lovely and spiced with just the right amount of sweetness. This time around instead of one big pie I made some individual sized tarts so now I have a bunch of those in the freezer for any time I am feeling like it and I didn't have to eat a whole pie myself. LOL.

This time I also made a vegan pumpkin ice cream to serve with it which I found over on Tasty Yummies. I was intrigued by a vegan ice cream and was very impressed with it. I couldn't find almond milk so used oat milk and I used brown sugar as that was all I had. I really liked it a lot and it went perfectly with the pumpkin pie. It has also piqued my interest in exploring more vegan ice cream recipes. 

Pumpkin Pie

Ingredients:
  • 2/3 c brown sugar
  • 1 1/2 tsp cinnamon
  • 1/2 tsp ground cloves
  • 1/2 tsp ground allspice
  • 1/2 tsp nutmeg
  • 1/2 tsp ground ginger
  • 1/2 tsp salt 
  • 2 eggs 
  • 1 1/2 c cooked mashed pumpkin, well drained (roasted and then mashed is best)
  • 1 can evaporated milk
Method: 
  • Combine sugar, cinnamon, cloves, allspice, nutmeg, ginger & salt. 
  • Add eggs, pumpkin & cream and mix well. 
  • Pour into an uncooked pastry shell. 
  • Bake at 210 C for 15 minutes. 
  • Reduce heat to 180 C for 40 minutes, or until knife inserted in centre comes out clean.

For my pastry I use my Gramma's recipe it is the best pastry in the world:

Gramma's Pastry
(for one single crust pie)

Ingredients: 
  • 1 1/2 c plain flour
  • 1/2 tsp salt
  • 1/2 c butter (gramma used lard)
  • 1 tbsp white vinegar 
  • 1 small egg 
  • water
Method:
  • Combine flour and salt. 
  • Cut in butter using a pastry blender.
  • Place egg in a 1 cup measure and lightly beat, add vinegar and top up with water to 1/2 cup. 
  • Add to flour mixture and little at a time until you have a soft pastry (you probably will not need all the liquid). 

Saturday, 19 November 2011

November 2011 - Happy Birthday Delicious magazine


Happy birthday to delicious. magazine. Imagine 10 years old now. It is almost hard to believe that it has been going for that long however as I sit here and look over at the shelf in my bookshelf full of magazine is a clear indication that it is true. It is a truly amazing collection of recipes and articles on a wonderful wide range of cuisines and topics. 

What else but a fabulous dessert could be made from this issue? There was some lovely looking savoury recipes like Bill Granger's Coriander & Maple Syrup Lamb Racks, Rick Stein's BBQ butterflied lamb with olive oil chips and tomato, eschalot & basil salad or John Wilson's Chicken Kiev Burgers. While all of these sounded very good, especially Bill's recipe. I really wanted to make a sweet recipe. 
Something else that was necessary, whatever recipe I made it had to be one of Valli Little's recipes. So much of what I have made out of delicious. magazine has come from Valli Little. Almost all of her recipes have been a success for me. I can't think of any off the top of my head that I would call a failure only things that I would tweak for my own tastes. It just seemed right that whatever I made from this birthday issue would be something of Valli's. 

Having said that, I did for a very short amount of time consider making Christopher The's amazing Mango Meringue Birthday Cake on the front cover. I really would love to make it one day. The recipe is long and involved and I would need to buy another two 20cm round springform pans, although I suppose I could halve the recipe. It is certainly not something that you can just whip up in a few hours. One day I will make it, although I have been saying that about Adriano Zumbo's V8 cake for two years now too. 

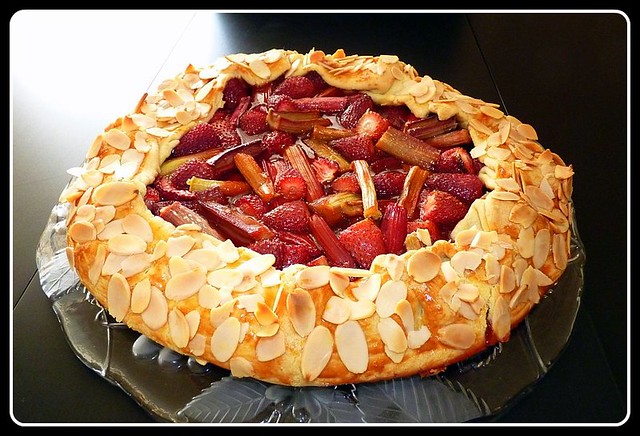
I had my grandparents and great-uncle & his partner coming up for dinner at slightly short notice and needed a dessert for the meal. I decided it was the perfect opportunity to make something from this issue. I decided on Valli's Strawberry & Rhubarb Galette. It was very easy and quite quick to make but it gave a stunning result. Everyone was very impressed with it. My grandmother particularly loved the pastry. I only made one change from the recipe  and that was to use yoghurt in the pastry instead of sour cream. The yoghurt reduces the richness of the pastry a bit. The rose cream that was served with it was very good too, although I reduced the amount of rose water worried that it would be overpowering but I really shouldn't have full strength would have been better I think. It was such a wonderful dessert with really good flavour. I would definitely make this one again. 


Wednesday, 9 November 2011

Chocolate Mousse

Sorry, sorry, sorry I have been absent for so long. I was sick for a while and then was in Sydney for an appointment a visiting friends. Since I came home things have been difficult, depression has been nipping around my heels. Sapping my energy and making me lose interest in doing anything. I have so many things to blog about I hope that I can catch up. 

I doubt that I am going to get through all of the remaining recipes in Sydney Food this year and to be honest I am not really all that worried about it now. I am getting to a point where I have made the majority of the recipes that I really want to and easily can. There are a few things that I just don't want to make, a couple of the seafood dishes. I have already said on numerous occasions that I am not keen on seafood and while I thought it would be good to make myself explore some new things I am now wondering if it is worth spending a bunch of money (seafood is expensive out here) on dishes that I am probably not going to enjoy. There is also one dish in the breakfast chapter that I have no desire to make, the jam doughnuts. I am not keen on doughnuts, I normally find them too fatty for me. I am not keen on the idea of deep frying. So I think I will leave that one as well. 

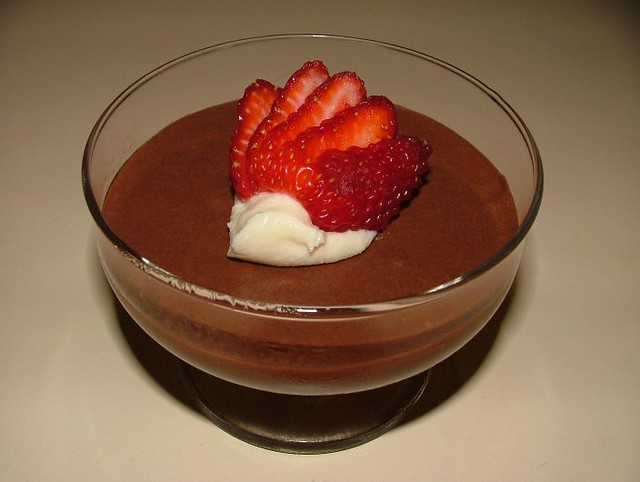
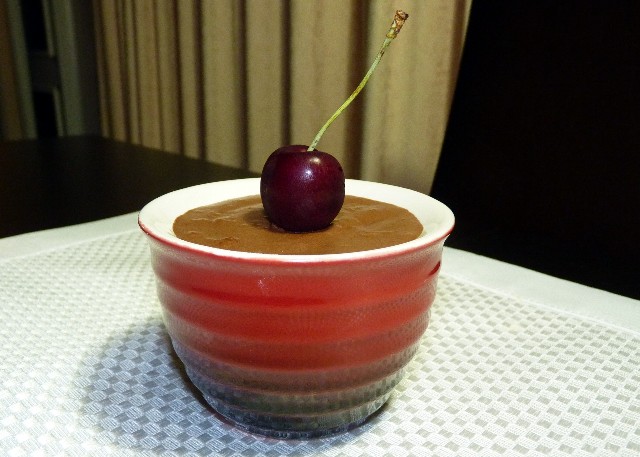
Now onto this recipe, the chocolate mousse. It was like pretty much any other chocolate mousse. Standard ingredients chocolate, cream, eggs. It was way, way too rich for me and gave me an upset stomach. In the October 2003 issue of Delicious magazine there was a recipe for a lower fat chocolate mousse. I have been making chocolate mousse using that recipe ever since. It is the recipe that I will post here as it is one I would definitely recommend trying as it is easy with a great taste but without all the fat. 

Low-fat Chocolate Mousse

Serves 6 - 8

Ingredients: 
  • 200 g dark chocolate (I use Lindt 70%) 
  • 2 tsp powdered gelatine 
  • 50 ml boiling water
  • 100 g low-fat ricotta 
  • 300 ml low-fat custard 
  • 2 tbsp brandy (I prefer 1 tbsp Kahlua)
  • 3 egg whites 
Method: 
  • Melt chocolate over simmering water (or in microwave if preferred) 
  • Add gelatine to boiling water and whisk until it has melted. Leave to cool slightly.
  • Combine ricotta & custard in a processor then add gelatine mixture. 
  • Slowly stir in the melted chocolate and the Kahlua. 
  • Beat egg whites to soft peaks and fold through chocolate mixture. 
  • Divide between serving dishes and refrigerate until required. 
 Low-fat mousse: 


Bill's Chocolate Mousse: 


Sunday, 2 October 2011

Pecan Maple Pie

Well, my cold decided to hang on a lot longer than I had expected it would. I had hoped to get all sorts of things made and done over the past week however it was not to be. It is a long weekend here and finally today I started to feel like I was getting back close to 100% although I have all of a sudden gotten very tired tonight. Perhaps I will manage an early night. 

Lately I have found myself in a little bit of a slump when it comes to my plans for my little blog. I haven't made anything from Bills Sydney Food in ages. I think it started when I had a couple of things that I did make (yet to be posted about) that just did not work. I am also finding myself in a position where I have made most of the things that I really wanted to and am now left with the others that I am either ambivalent about or and really unsure about making. There are also two recipes that I did make but the photos are not up to scratch so need to be remade. I have still been cooking and have so many things that I want to post about but just haven't done the posts as yet. I may yet do a few posts of just the recipes and pictures to get them up, a bit lazy, but at least it would let me catch up. Every time I post something that I have only just made I feel a little bit guilty as there are so many other recipes with their hands sticking up saying pick me, post me! LOL. 
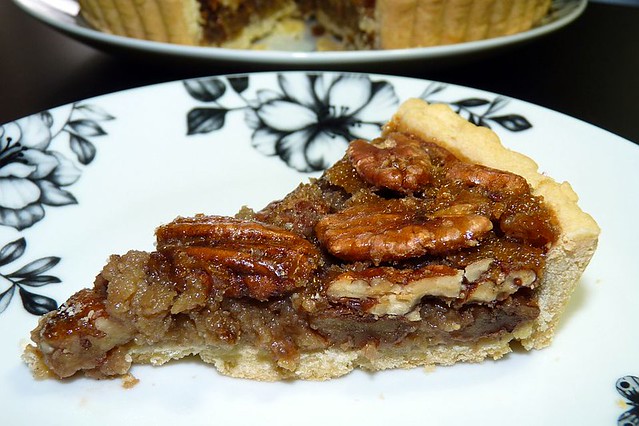
Anyway, this is something that I did just make, well last night anyway. I just wanted to make a pie this weekend. I sat down with my mum's old recipe folder and handwritten cards and came up with a recipe for pecan pie that sounded perfect. I did make a few changes though, reducing the sugar as I usually find pecan pie too sweet. I also substituted the golden syrup in the recipe for maple syrup. I thought that this might be an interesting little twist on the regular recipe, plus I find maple syrup less sweet than golden syrup, not sure if it is or whether that is just psychological. It all came together really quickly and easily. I think next time I would use a tart tin that is a little deeper or a little bigger as I couldn't fit all the filling in although there was only about 1/2 c left over. I served the pie with a drizzle of cream today with lunch.

Pecan Maple Pie

Ingredients:

1 1/2 cups pecans
1/2 cup brown sugar, tightly packed
2/3 cup maple syrup
2 tablespoon Jim Beam (or other bourbon) (optional)
1/4 cup unsalted butter
3 eggs
1/4 cup pure cream
1 teaspoon vanilla
1 pie crust (see below)

Method:

Combine sugar, syrup, bourbon and butter in a saucepan over a medium-low heat and bring to the boil stirring occasionally and then remove from the heat and allow mixture to cool.
Beat the eggs with the cream and vanilla and then add to the cooled syrup.
Spread the pecans over the bottom of the pie crust.
Pour the syrup mixture over the pecans.
Bake at 170C for 45 minutes or until a toothpick inserted into the centre comes out clean.


Pie Crust 
1 1/2 c plain flour
1/2 tsp salt
125 g butter, cut into chunks
1 tbsp white vinegar
1 small egg
water

Combine flour and salt in a food processor, add butter and pulse until mixture resembles breadcrumbs.
Place egg in a 1 cup measure and lightly beat, add vinegar and top up with water to 1/2 cup.
Add to flour mixture and little at a time until you have a soft pastry.
Roll out to size required, line tart tin. Prick the base with a fork and then place in the freezer for 10 - 15 minutes.
Line the pie shell with baking paper and fill with pie weights, rice or dried beans and bake at 190 C for 15 minutes. Remove the baking paper and weights from the pie shell and return to the oven for a further 5 - 10 minutes or until lightly browned.  


Saturday, 17 September 2011

Baked Raspberry Meringue Cheesecake

A few weeks ago my friends and I decided that we needed to catch up more regularly. So it was decided that we would have a barbecue once a month rotating houses each month. It is kind of like a pot luck situation where each one brings something. I volunteered to make a dessert for a first gathering. 

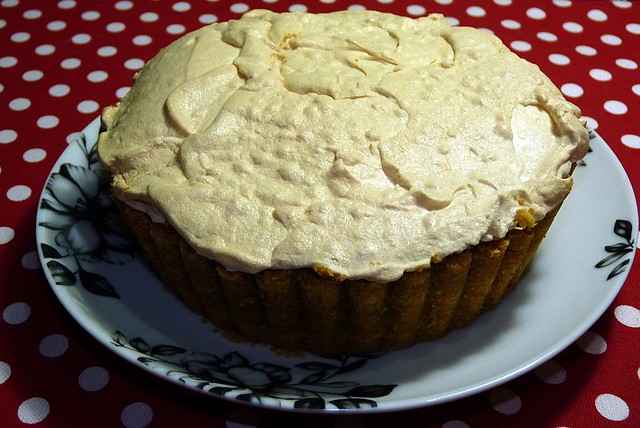
I wanted to make something a bit different but something that would be family friendly and yummy. There were a couple of choices between different tart recipes that I have had bookmarked for a while. However, I had an idea for something brand new. It was kind of based around the lemon & coconut meringue cheesecake that I made last year. However I wanted to lighten it up a bit. So I decided to add in some strained vanilla yoghurt. I made both a large one (probably too large now I look at it) and a small one for blogging and taste testing purposes of course, lol. I am very pleased with how this has turned out. The raspberry flavour is just lovely and it is not too heavy. I made sure to go easy on the sugar as it could have easily been way too sweet. I hope that it is liked by all. 

Baked Raspberry Meringue Cheesecake 

Ingredients: 
  •  1 packet granita biscuits
  • 1 packet marie biscuits 
  • 170 g butter, softened 
  • 500 g cream cheese 
  • 250 g strained vanilla yoghurt 
  • 1 tsp vanilla paste 
  • 2/3 c caster sugar 
  • 5 eggs
  • 4 egg yolks 
  • 400 g raspberries (crushed and strained to remove seeds)
Meringue:
  •  4 egg whites 
  • ¼ tsp cream of tartar 
  • 2/3 c caster sugar  
Method:
  • Process biscuits until finely crushed. Add butter and mix well to combine. Press into tart tins and chill for at least 1 hour. 
  • Place cream cheese & yoghurt in mixer bowl and beat until well combined. Add vanilla and sugar and beat to combine. Add eggs & yolks one at a time beating well after each addition. Add raspberry puree and mix well to combine. 
  • Pour filling into tart tin bake at 160 C for 50 minutes, it should still have a slight wobble but not too much. Remove from oven and cool for about 20 minutes. 
  • In a clean mixing bowl beat egg whites and cream of tartar to soft peaks. Slowly add caster sugar beating until it is stiff and glossy and the sugar is completely dissolved. 
  • Spread meringue on top of cheesecake and then return to oven for a further 15 minutes or until nicely browned.
(From this I got 1 x 24 cm (5 cm deep) round tart tin and 1 x 10 cm (4 cm deep) round tart tin)


Friday, 12 August 2011

Blueberry Pie

I just love pie, both sweet and savoury, but sweet most of all. Pie always reminds me of my Gramma. In summer there was all kinds of fruit from their orchard and berries from their vines. My two favourite fruit pies would have to be Gramma's fresh raspberry pie and the other saskatoon pie. Saskatoons are a lovely wild berry that looks similar to a blueberry. I guess they have a similar taste but there is a definite difference. I find them to be sweeter and definitely tastier. I remember going saskatoon picking with my Gramma when on holidays. It wasn't easy work although a lot easier than picking raspberries or blackberries. Plus the bonus is that you are in Canada and don't have to worry about poisonous Aussie spiders hiding in amongst the trees/berries, which I have had occur when picking blackberries. 

Another pie that my Gramma used to make was a Sour Cream Raisin pie and it is just to die for. There is one huge but when it comes to this pie. I have tried to make it myself and I discovered what the but is. It just doesn't taste the same without proper sour cream. By that I mean that my grandparents (and uncles) milked their own cows and separated their own milk producing wonderful natural untouched cream. I have to admit that there is nothing better than fresh milk and fresh cream. Gramma would allow the cream to sour naturally. Not so much that it was bad of course but just enough that you didn't want to dollop it on top of a bowl of berries. That is when you make the sour cream raisin pie. It is just not the same using the homogenised, pasteurised and cultured sour cream that you buy in stores. I would love to be able to buy real milk and cream. Alas I do not know anyone who milks their own cows (with the exception of my uncles, but they are in Canada not Australia), not that I really blame them, owning milk cows is hard work. Another problem is that it is illegal to sell so called "raw" milk for consumption. Ah, I guess that I will just have to make another trip to Canada so that I can make a sour cream raisin pie. 

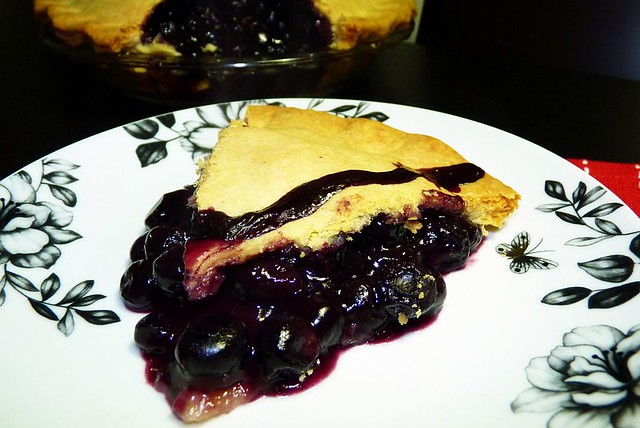
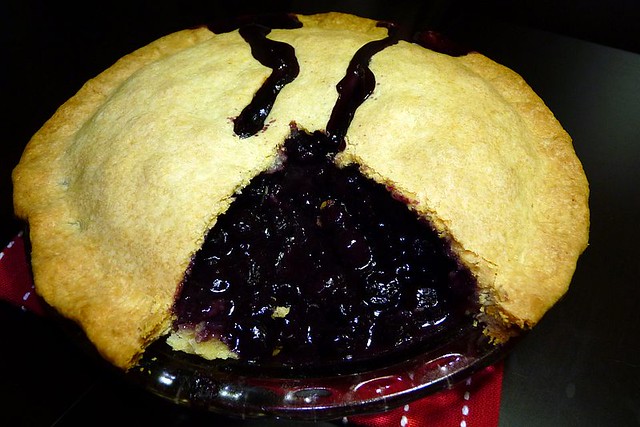
Now that I have waxed lyrical about my favourite pies I am going to tell you that I made something completely different. Blueberries are as close as it gets to saskatoons here and since I had a yen for pie I decided that it would be a good idea to try making one. After a quick google search I came up with this delectable looking Blueberry pie recipe over on Simply Recipes. I couldn't wait for it to cool down so the filling did run a bit when I cut into it but it was worth it to eat this wonderful pie. I didn't make the pastry recipe linked to in that recipe. I instead made my Gramma's recipe like I do for almost all pastry items that I make. It is a wonderful recipe. My Gramma made it with lard. I make it either with shortening (if I have it) but more often that not just with butter. It is best made with lard though. 

Shortcrust Pastry

Ingredients: 

2 c (220 g) flour
1 tsp salt
2 tbsp caster sugar (for sweet pies only, which is my addition)
2/3 c (150 g) lard, shortening or butter
1 tbsp vinegar
1 small egg
water

Combine flour, salt and caster sugar. Cut in lard using a pastry cutter, or use a food processor. 
Place egg in a 1 cup measure and lightly beat, add vinegar and top up with water to 3/4 cup. Add to flour mixture and little at a time until you have a soft pastry (you probably won't need all the liquid).