Well hello there lovely people. Long time no speak (write???). Who knows if this will continue, missing some creativity in my life. It has been suggested to me a couple of times to get back into my blog. So here I am.
I have heaps of things that I have made over the many years it has been since I last posted here. However, I thought that I would start with something familiar, cake decorating.
It's 5 1/2 years since I move to the big city and I've been with the same company the whole time too. It's a pretty good work place. As much as I whine about my job at times (and it is stressful) but the majority of the people here are lovely. Amazingly, we have 3 of the people here turning 70 this year. One in May, one a last week and one in 2 weeks! I just told them that I was going to make the cakes without giving them any options. I still have one to go but thought that I would post the two I have already done.
The first one was our office manager. She's very much an accessories person so I decided that it needed to be the theme of the cake some how. I did consider doing the whole handbag and shoes cake but I kind of missed the boat in timing, so in the end I made a handbag topper (which was also make of cake) to go on a standard round. I was pretty happy with the whole thing however I found that the white Satin Ice fondant was a little dry and the Fondtastic black icing was a little soft. In fact the black fondant started to slip on the little handbag but most people thought it was supposed to be that way given it was sitting on the "floor". LOL, I went with it.
Our next 70th was a little bit more tricky, mainly because I really don't know what the big kahuna does outside of the office. There was a bit of investigating and checking with some of the "long termers" here (there's a lot of them) and came up with he likes to go walking/hiking. After doing a bit of googling and my own designs, I came up with a two tier cake with a walking track with boots and hiking poles. I was able to use the "chocolate stones" that I just had to have that would "come in handy one day" (and they did!). It was universally loved. The birthday boy took pictures of it himself to show his walking group. 😊
They were, of course, made with my regular chocolate cake. The hiking cake I alternated ganache and dulce du leche in the layers and coated with peanut butter buttercream. I had done a "snickers cake" for my birthday in June which was particularly successful so decided to go with that again. It was so amazingly delicious!
I have a plan for my 3 cake in a couple of weeks. That boss man isn't a big fan of chocolate cake, so will have to find a different base... maybe carrot. I'm not sure yet. Looking forward to it though.
Well, hello there. It has certainly been a while. However, here I am writing again. I haven't really got the cooking mojo thing happening again however I do have the urge to write again. I do have a massive back catalogue of stuff that I have cooked in the last year when I just didn't feel like writing. So I may get on to posting some of those. Might be a bit of a stretch to remember some of them though. Photos are great but they cannot always revive the tastes and smells of something in the distant past. I will try though.
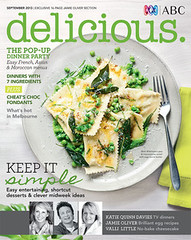
I can't say if it was delicious magazine that lost me or if I was just so ambivalent about cooking etc that I glazed over a lot of very good recipes. I will go back and have a look at the last few months. I found last month's issue buried on my table yesterday with not even a page turned. The new issue came out today. I have dutifully bought it although that has more to do with the absolutely stunning cake on the front cover, oh and the fact that it is the 150th issue, than duty. Although there is a bit of duty to given that I have a standing order for it from my local newsagent and, well, I just haven't gotten around to cancelling it. They put a sticker with my name on it and everything so I just can't say no to that, lol. I do have one thing that I made from the April issue (I think) that I will get posted up next.
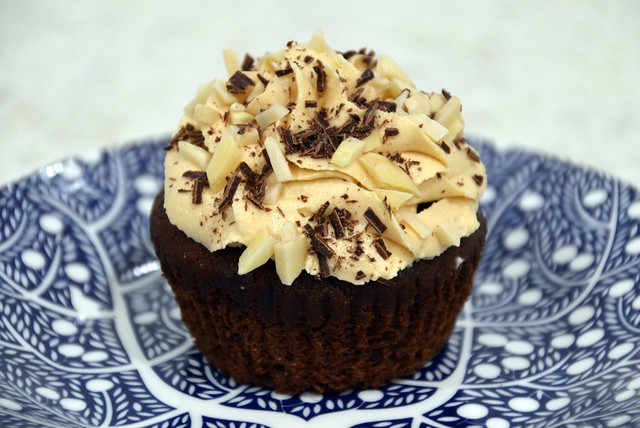
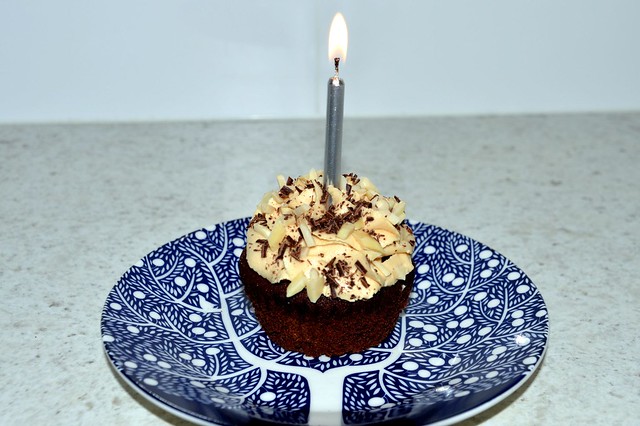
My first post in ages is inspired by my desire to share these cupcakes far and wide. It was my birthday last week. I'm not saying how old because, well, I don't want to be this old. Unfortunately, I didn't really have a choice. Let's just say it was one of those 0 birthdays... sigh. I did have a nice day. My boss & his wife took me to lunch, my grandparents came along too. I received some lovely flowers, a few lovely text messages, fabulous forum messages and facebook posts. Since there wasn't much of a celebration I decided that I would make myself some cupcakes as a "happy birthday me".
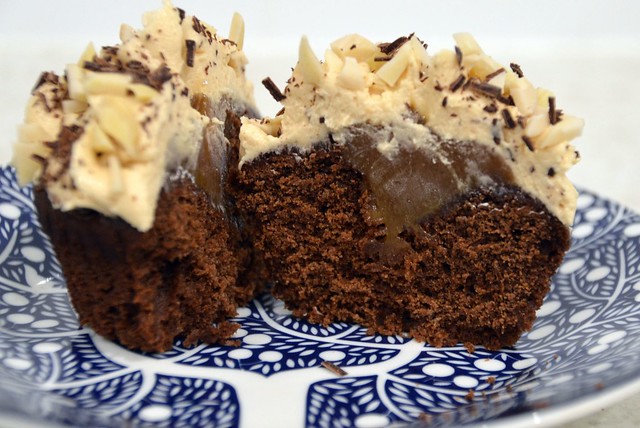
I loooooove snickers bars. I mean really. I don't buy them because if I do I inhale them. My doctor tells me it is okay to buy them occasionally and suggests eating them "mindfully". Ha ha ha ha. No, they get inhaled. I can plan the whole mindful thing up to the point where I open it and, well, the next thing I know it is gone. I've seen all sorts of recipes over the years for snickers cupcakes and they usually involve the use of the actual snickers bar in them at some point. But, yeah, that just isn't going to happen here. They would be inhaled before going any where near being chopped up or melted down for use in cupcakes. So I decided that I would use all the elements and see what came out. So what did I do. I made chocolate cupcakes, cut a hole in the centre and filled with dulce de leche, iced with peanut butter buttercream and then sprinkled with chopped nuts and grated dark chocolate. **drool**
I wasn't sure on a chocolate cupcake recipe. I sometimes use my regular cake recipe but it makes such a big mix. Anyway I googled and the top result was a taste.com.au recipe from an old Notebook magazine issue (I miss that magazine). They were really easy and quite tasty. Possibly not quite as chocolatey as I would have liked but they were a nice texture, slightly dense which was perfect for my purposes. I also liked that they weren't overly sweet since there was plenty of sweetness to come. I would definitely make these again, oh actually I already have.
Preheat oven to 160°C. Line 18 x 1/3-cup (80ml) capacity muffin pans with paper cases.
Combine
the chocolate and water in a small saucepan over low heat. Cook,
stirring, for 5 minutes or until chocolate melts and mixture is smooth.
Remove from heat and set aside to cool.
Use
an electric mixer to beat the butter and sugar until pale and creamy.
Add the eggs, one at a time, beating well between each addition, until
just combined. Add the flours and cocoa powder and stir until just
combined. Add the melted chocolate mixture and stir to combine. Spoon
evenly among the lined muffin pans. Bake in preheated oven for 20
minutes or until a skewer inserted in the centre comes out clean. Remove
from oven and transfer to a wire rack to cool.
Next was the dulce de leche. I had this in the fridge, I have had it in the fridge forever. I made it in my thermomix, ages and ages and ages ago. I was kind of surprised that it was still okay. There was a bit of crystalised sugar on top but not bad and it still tasted great. Plus, not dead so it was fine, lol. I cannibalised a few recipes online for this one. Good thing I scribbled it down as I went, I don't always do that.
Dulce de Leche
1 litre milk
100 g sugar
150 g brown sugar
300 g cream
1/2 teaspoon bicarb soda
Place all in the bowl, 45 - 50 minutes; Varoma; Sp 5.
Use the basket on lid for evaporation without splatter.
**Will keep forever**
(Oooh, I just looked at my flickr feed. The photo I took of the finished product was taken on 29/6/2013, so yeah 2 years. Um, how on earth did a pot of caramel last in my fridge for 2 years? It wasn't like I didn't know it was there. **startled face**)
Now, for snickers, you obviously need nuts and what better way to get that in than peanut butter buttercream. This turned out nice and creamy, not too sweet.
Peanut Butter Buttercream
165 g butter
3/4 c peanut butter
500g icing sugar
1-2 tbsp milk
Cream butter & peanut butter until smooth. Add icing sugar slowly. Add milk to get consistency desired.
Assembly:
Use a knife to cut a cone shape into the cupcake. Fill that with dulce de leche, pipe buttercream on and then top with grated chocolate & chopped nuts.
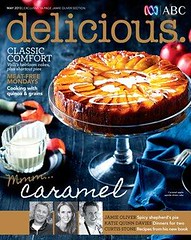
Wasn't much I wanted to make. I have started doing the supper for our Toastmasters meetings so decided that making one of the sweet items from the issue would be good. I decided on this cake. I have always seen chocolate cakes with beetroot and have been tempted to make them. It turned out really well.
Valli also had a recipe for a parsnip cake with coffee icing. I would have liked to have made that but just wasn't sure how it would turn out. I hate parsnips. Although I assume that, like carrot cake, you wouldn't be able to taste it. Parsnip is a strong flavour those so decided not to do it.
Beetroot Chocolate Fudge Cake
250 g
dark chocolate
3 medium
free-range eggs
250 g
light muscovado sugar
2 tbsp
golden syrup
2 tbsp clear honey
1/3 c (50g)
self-raising flour
1/3 c (50g) plain flour
1/4tsp
bicarb soda
1/4 c (25g)
cocoa powder
1/2 c (50g)
almond meal
250 g
beetroot, peeled and finely grated
100 ml
strong espresso, cooled
1 1/2 tbsp sunflower oil
Pre heat oven - 160 C. Grease & line 20cm square tin (I did actually line it I don't normally bother but thought it was probably necessary and yes I think it was)
Melt chocolate over water, cool slightly.
Beat eggs, sugar, syrup &a honey - 5 min or until thick.
Add flours, bicarb & cocoa mix. Fold in almond meal.
Drain grated beetroot (I didn't really have anything to drain maybe because I chopped in tmx instead of grating)
Stir in beetroot, chocolate & oil.
Bake 1 hr 15 min or until skewer comes out clean. (I think mine took longer but I forgot to set the timer initially so not sure)
All of the recipes I wanted to make from this issue were sweet things. I have talked before about limitations on baking since I live on my own. I do give some away to friends but even so I can't give them everything.
The first thing I really wanted to make was the little strawberry galettes. These look so easy but they had marzipan in them and I just hate marzipan and I wasn't really sure what to replace that with. They are stunning looking and the strawberries are so good at the moment so I might find a way to make something similar.
I really want to try the Watermelon & rose layer cake. I never would have thought about including watermelon in a cake. It certainly isn't a cake that would keep for any length of time given how wet watermelon is. I think that it would quickly send the cake soggy. It is a very interesting combination though so I hope to get an opportunity to make it some time.
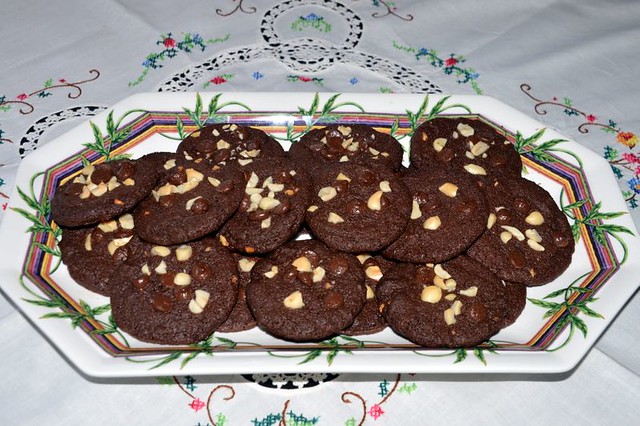
In the end I decided to make the Peanut butter & dark chocolate cookies. The picture in the magazine they looked really good. The recipe sounded great. I ended up with a very loose dough and it was very difficult to roll into balls. I also found that mine spread out a lot more than the photo in the magazine showed. They still tasted great and everyone I shared them with loved them. Very tasty recipe but I am not sure I would make them again.
Peanut Butter & Dark Chocolate Cookies
100 g unsalted butter, chopped
200 g dark chocolate, chopped
1/3 c (100g) crunchy peanut butter
2/3 c caster sugar
1 egg, lightly beaten
1 1/4 c (185 g) plain flour
1/2 tsp bicarb soda
1 tbsp cocoa powder
2 tbsp roasted unsalted peanuts, chopped
Pre heat oven - 180 C
Combine butter & 100 g chocolate in a bowl over simmering water and stir until melted. Remove from heat.
Stir in peanut butter, followed by sugar & egg. Sift over flour, bicarb and cocoa and fold in. Fold half remaining chocolate.
Combine remaining chocolate and nuts.
Roll dough into balls, flatten slightly and press on some of the nut mixture. Bake 12 - 15 min or until cooked but still soft in the centre.
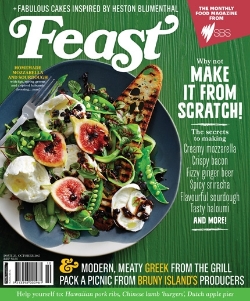
I haven't bought an issue of Feast magazine in a long time. I did buy the first 6 or 8 issues but found that it wasn't really my thing. I found that a majority of the recipes called for speciality ingredients that I just could not get easily or, because they were perishable, not at all. There were no substitutes offered for those speciality ingredients. The reason given for this was to encourage people to seek out the ingredients in areas they wouldn't normally go. This is fine if you are in a city but when in a regional area it is a lot more difficult and can end up very expensive. Most of the time when I would go looking for ingredients online there out be only one thing that I would want to purchase from the particular online store, or I would pad out orders to make the postage seem worthwhile. However all that ended up happening was I got a bunch of stuff in my pantry that I didn't really want. So I stopped seeking the ingredients out and then stopped buying the magazine altogether.
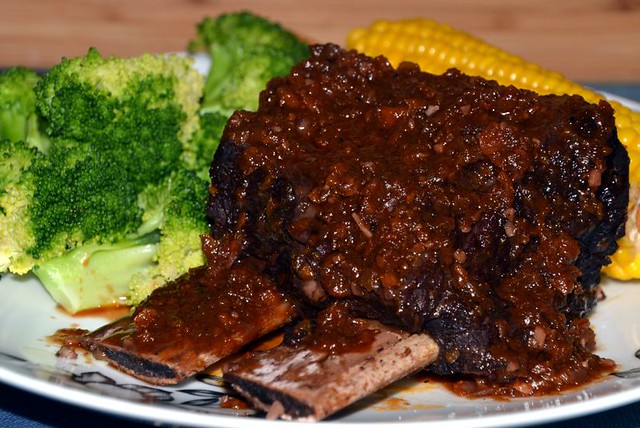
Occasionally a cover would catch my eye and I would flick through it but I was never struck enough to purchase. However, this time I was caught by two things. The idea on the front cover of how to make my own mozzarella and haloumi, which I haven't done yet, and the Asado in black sauce with chocolate recipe. The picture just looked fantastic and I have always been interested in how chocolate works in savoury dishes. This was really, really easy to make. I know from previous recipes that my butcher does up packs of beef short ribs so I just bought some of them instead of asking for asado. Besides the ribs all I had to do was to buy some red wine. It turned out to be an expensive trip as they had one of my favourite wines on special, 2 for $40 when they are $32 each so I bought 4...oops. Since the recipe only used 1 cup I didn't buy anything else for cooking with. The meat ended up fall off the bone and the chocolate added an amazing richness to the sauce. Just a little bit of sweetness but so much depth. I was actually surprised at just how much it added to the over all dish. I wasn't really sure what to serve with it and looked around for something to go with it. In the end though I decided to go with something simple on the side so as not to take away from the flavour of the ribs and served with steamed broccoli and corn on the cob. I highly recommend this dish and I will definitely be making this again.
Asado in Black Sauce with Chocolate
1 kg asado beef ribs (or short ribs)
6 garlic cloves, finely chopped
1 tsp dried oregano
1/2 tsp allspice
1/4 tsp cayenne pepper
60 ml olive oil
1 onion, finely chopped
1 celery stick finely chopped
1 large carrot, finely chopped
110 g dark brown sugar (I didn't have dark so used regular)
70 g tomato paste
1 c (250 ml) red wine
2 c (500 ml) beef stock
20 g 70% dark chocolate, finely chopped
Grind 3 garlic cloves, oregano, allspice, cayenne and 1/2 tsp salt into a paste. Rub all over meat, cover and refrigerate for 2 hours or overnight.
Brown on each side in batches, set aside. Cook onion, celery, carrot and the remaining garlic until softened. Add sugar and cook 2 min. Add tomato paste, cook 2 min. Return ribs with wine & stock, bring to the boil and then reduce heat and simmer, covered, for 2 hours or until tender. (I think it would be good at about 160 C in the oven too).
Remove ribs. Boil sauce until reduced 1/3. Remove from heat and add chocolate. Pour over ribs to serve.
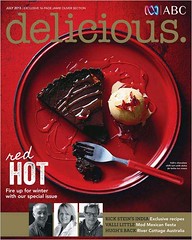
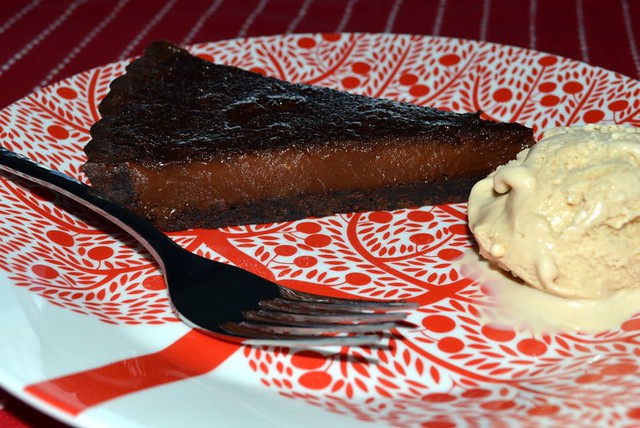
I am not going to pfaff about with what is on the inside of the front cover. There are other things to make, and I may get to those later, but to start with I just could not go past the cover recipe. I have often lamented about the glorious cover recipes with desserts on the front and wanting to make them but no one to cook for. It hasn't changed but this time around I didn't care I decided that I would just make it. I have frozen a few slices to see if that will work. I have some to go to the office and finally some to go to a friend. Although, my friend isn't keen on chilli so I am not sure how she is going to go I guess her hubby will get it all if it is too strong for her. I will suggest freezing if it has too much of a kick for her. I had thought about reducing the amount of chilli in the recipe but I really wanted to make it as it.
Talking about that, I didn't make it completely according to the recipe as I didn't make the chilli syrup to drizzle over it. Well, that is not exactly true. I did try to make the syrup but something went horribly wrong. I wasn't really sure what it was initially. I had a jar of glucose syrup in the cupboard, which I admit, had been there a while. After I ended up with a weird lumpy mess I had a look at the jar and it was use by 1996! I knew it had been around a while but not quite that long. After tasting the tart I don't think that the syrup was really necessary anyway.
I made this recipe over two days starting with the dulce de leche ice cream that goes with this and finishing with the tart. It wasn't difficult it was just a bit time consuming. I made everything from scratch, so it added a bit to the time. I will post the ice cream recipe in a different post.
I will start out with my recipe for the dark chocolate pastry I used. I cannot get the recommended Careme pastry so I made my own.
Dark Chocolate pastry
1 1/4 c flour
1/3 c dark cocoa (I used Plaistowe from the supermarket)
1/4 c caster sugar
125 g cold butter, chopped
1 egg
1 tsp vinegar
1 - 2 tbsp water
Add flour, cocoa and sugar to Thermomix bowl (or food processor) mix 5 sec on sp 4.
Add butter 10 sec on sp 4 or until it resembles breadcrumbs.
Whisk together egg, vinegar and 1 tbsp water. Add to flour mixture, knead closed lid position for 30 sec, checking to see if further liquid required. I did add the extra 1 tbsp water.
Wrap in plastic, set aside. If hot place in fridge, if cold on the counter will be fine.
Line 23cm tart tin, place in freezer for 10 min. Remove and fill with baking paper and pie weights (or rice) and bake for 10 minutes at 180 C, then remove weights and bake for a further 10 minutes.
Chocolate Chilli Tart
adapted from Valli Little
300 ml thickened cream
150 ml pure cream
2 tbsp caster sugar
200 g dark chocolate, finely chopped
100 g milk chocolate, finely chopped
Seeds of 10 cardamom pods, ground
1/2 tsp chilli powder
3 eggs, lightly beaten
Bring creams & sugar to a simmer then remove from heat and add chocolate, cardamom & chilli and stir until smooth. Cool a bit and then add eggs. Pour into tart case and bake for 20 -25 min. Cool in pan.
I had enough chocolate custard for two ramekins and baked them too. The hit of chilli seemed stronger in them than the tart.
I had so much trouble deciding what to make from this issue. I kept see-sawing back and forth. Now it is almost the end of the month and I decided tonight that I just had to pick something and make it.
So the recipes that I was see-sawing over. Valli's Coffee & walnut cake. It looks so good but I really didn't want to buy the Camp Chicory & Coffee essence to make it. I am sure that I could have used a shot or two of espresso but I wasn't sure how much or how strong, so I took the easy way out and moved on.
Jill Dupleix's Bean thread noodles with tofu & eggplant looks fabulous. Just packed full of flavour and a great looking vegetarian dish. However, it would have involved buying at least half of the ingredients and I am trying to use up stuff in my cupboards, not add more to it and I just didn't have good substitutes.
Katie Quinn's Harissa & capsicum chicken was the recipe that was winning the race right up until the end. I had planned to make it tonight and even took the chicken out of the freezer. Two things went wrong. The chicken wasn't fully thawed and secondly I was so late home from work tonight that I just wanted to eat then and there, so I had boiled eggs and toast instead. Hopefully I will get this made tomorrow night.
In the end I decided to make Valli's Raspberry, chocolate & almond tea cake tonight. The photo looked good and it sounded really good with the added bonus that I didn't need to buy anything. I did make this gluten free. It worked okay but I think I should have cooked it for another 5 minutes it was still a little doughy in the middle. That was my fault though, the skewer didn't look quite clean but I didn't follow my instincts. It is nice but I am not sure I would make it again. Oh, and my photo isn't all that great, it just did not want to slice well, that might be because I wanted to try it so didn't wait for it to cool.
Raspberry, chocolate
& almond cake
150g softened unsalted butter, chopped
2/3 cup (150g) caster sugar
2 eggs
2 tsp vanilla essence
50ml milk
1 cup (150g) gluten free flour 2 tsp baking powder
150g almond meal
¾ cup (135g) dark choc chips
150g raspberries
1/3 cup (25g) flaked almonds
Icing sugar, to dust
METHOD
Preheat oven to 170°C (fan-forced).
Grease 20cm round cake pan.
Cream butter
and sugar until pale. Add the eggs, one at a
time and beat to incorporate.
Add the vanilla and milk and beat to combine.
Fold in flour
and almond meal and finally the raspberries and choc chips.
Spread mix in cake pan and bake for 50 - 55 minutes or
until a skewer is inserted into the centre comes out clean. Turn out after 10 minutes and cool completely.
Dust with icing sugar to serve.
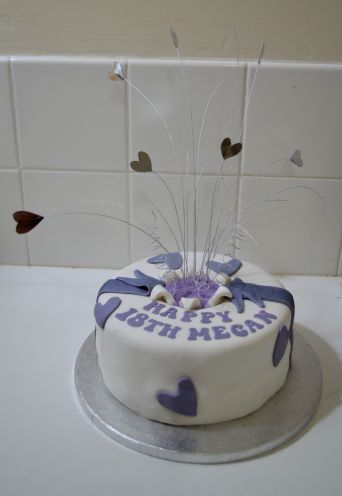
So not literally an exploding cake. This is the first time that I have done a cake with the wires coming out of it, so the explosion. Most of the pictures of exploding cakes that I have seen online have the cashous in the middle. However I thought that if you use those then when you cut the cake they would go everywhere. I decided that I would use coloured sugar instead and it worked really well. The hearts on the cake look a bit weird. The cutter was a bit of a weird shape but that was the only one that I could get on short notice. I will have to get myself a better heart cutter.
I had quite a lot of problems with it. The cake was really, really soft for some reason. It is normally quite dense, perhaps I beat it for too long. My ganache didn't set and then I had problems with the fondant. Everyone was really impressed with it though. I guess that we are our harshest critics.
I had a late request for a birthday cake for my friend's now four year old. She is such a beautiful little girl and, of course, I was happy to oblige. I am happy any time I am asked to make a cake either with plenty of lead time or short notice, it doesn't matter to me. I just love to decorate. I do my best to make every cake as pretty and good as I can within the time frame that I have.
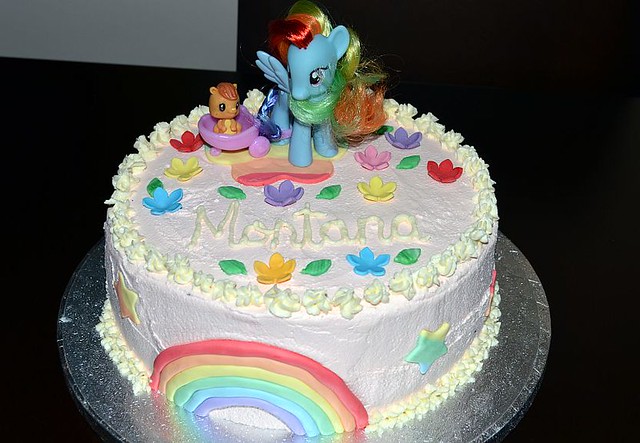
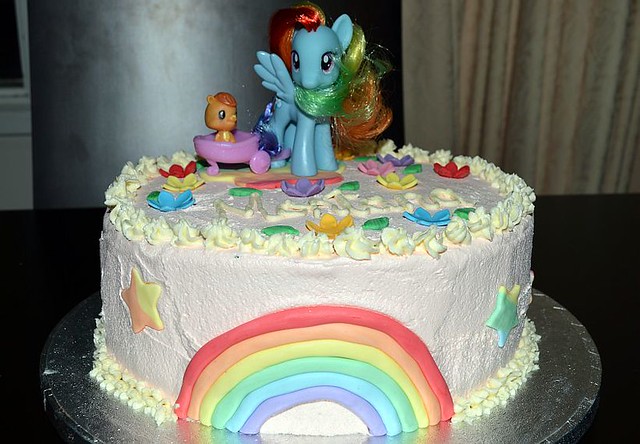
I was asked if I could do something that involved My Little Pony. My friend gave me one of her daughter's toys to put on the top of the cake. I do, sort of, remember My Little Pony from when I was young. All of these cartoons seem to be doing their circle and coming back around. However since I have no children of my own it has been a long time since I saw any of them. I did a quick google to see things that were associated.
I made my standard chocolate cake, which everyone loves so much. I would like to come up with a recipe for a cake that is equally as good but different flavours. I think I have said that before but I might start experimenting, it could end up quite expensive though. Anyway, I did the cake in two 20 cm sponge tins and joined them with a quick little chocolate icing. I decided, that since it was fairly hot, I would do a buttercream using half butter and half crisco. It actually turned out fairly well. One other time it was really dry and hard to spread for some reason. I coloured it pink, keeping some white aside for piping. I made accents with fondant and raided my container of excess flowers and leaves I have made for other cakes to put on top. I even piped her name on top. I have had problems writing with icing but this time it just worked perfectly. Hopefully I will be able to do it again next time.
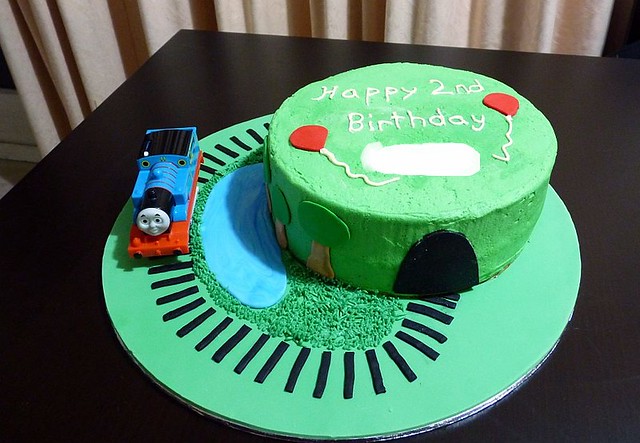
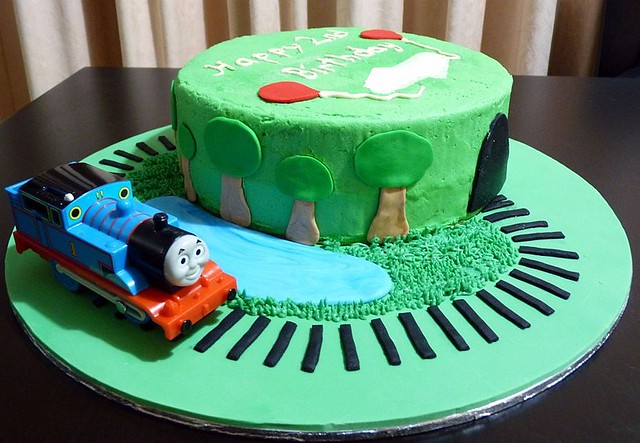
I had the honour of making a special cake for a wonderful little boy's second birthday. The little man in question is quite the fan of Thomas the Tank Engine so it was quite obvious that should be what his cake should be based around. I even had some ideas before his mother (my very good friend) asked me to make a Thomas cake. I was away on holidays for the week prior to the party so didn't get the chance to make exactly what I had imagined in my head. I had wanted to make my own Thomas figurine to go on the cake but I knew that I wouldn't have time to get it done and set before the party so while away I purchased a Thomas engine.
The cake was, of course, my standard chocolate cake. However this time I baked it in two separate 20 cm cake tins. I then sandwiched the cake together with creme patisserie and covered in green buttercream. For some reason the buttercream was very dry going onto the cake. It was lovely and creamy in the bowl but just wouldn't cooperate for icing the actual cake so it certainly wasn't as smooth as I had would have liked. However I was very happy with the rest of the decorations.
The birthday boy was very happy with it and happily drove Thomas over the grass on the cake. LOL.
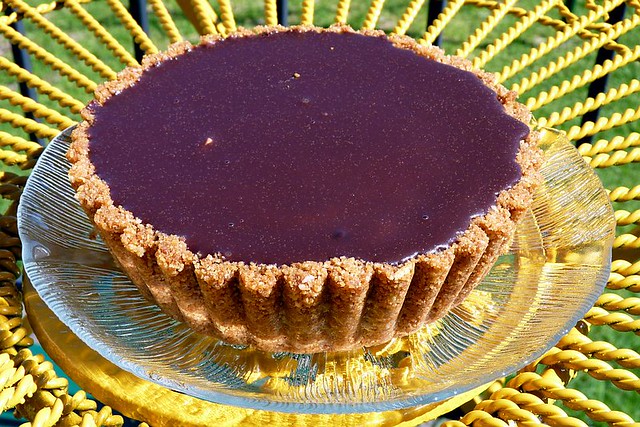
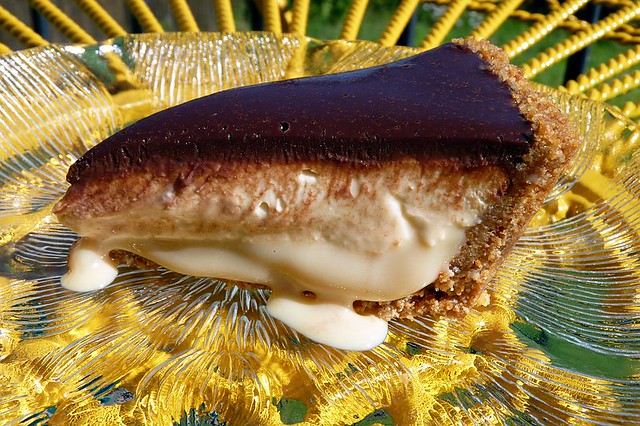
Over on Taste forums a week or so ago someone put out a request for a Mars Bar cheesecake. There are plenty of recipes around for mars bar cheesecake, most of which involve chopping up and/or melting Mars bars into a cheesecake mix. However that wasn't what this person was looking for. Described as having discrete layers of caramel, cheesecake and chocolate all in a biscuit base so, looking for something creative to do, I thought I would give it a shot to come up with something.
The caramel layer was easy enough, I just boiled a can of sweetened condensed milk. Although unfortunately I didn't boil it quite long enough so it is a touch runny. The chocolate layer was simple enough, a softish ganache made from equal quantities of cream and dark chocolate. You could make a firmer ganache but I wanted something nice and soft. My main issue was how to make the cheesecake layer "Mars bar-ish". I looked at some chilled cheesecake recipes. I looked up nougat filling recipes wondering if I could combine the two. Discarded most ideas with the thought of them being overly sweet and decided in the end I to go with something really simple. I added a good slug of vanilla extract (paste would have been better but I don't have any at the moment) and used dark brown sugar in the mix instead of white or icing sugar. The result is, if I do say so myself, rather spectacular. It it doesn't quite have the taste of a mars bar, the tang of the cream cheese still there. You could add more sugar if you want, I hedged my bets on that last night when I was making it as I though maybe with the sweetness from the caramel it would be overpowering. For me personally it is perfect but please do it to your own taste. Out of this recipe I made 1 x 15 cm tart and 2 x 6 cm tarts, it would probably fit perfectly into a 20 cm round x 3 cm deep tart tin.
Chocolate Caramel Cheesecake
1 400 g tin sweetened condensed milk (you could also use Top'n'fill)
100 ml double cream (you could used thickened I think)
2 tsp vanilla extract
3 tbsp dark brown sugar
100 ml pure cream (you could used thickened)
100 g dark chocolate, finely chopped
Method:
Simmer tin of sweetened condensed milk in a large pot of water, making sure that the water is at least 2.5 cm over the top of the tin at all times, for 3 - 4 hours. (If you let the water level drop below the tin it can explode, please be VERY careful when doing this, other methods for turning sweetened condensed milk in to caramel are discussed here or here.
Finely grind cookies in a processor or you can put them in a bag wrap with a tea towel and beat with a rolling pin or meat mallet. (The rolling pin method is particular good if you are stress or frustrated. LOL) Combine crumbs with melted butter and press firmly into base and sides of a tart tin. Refrigerate for at least 30 minutes.
Beat cream cheese in a mixer, or by hand, until light and fluffy. Add double cream and beat to combine. Add vanilla and sugar and beat until sugar has dissolved.
Spread caramel in an even thick layer in the tart tin. (I only used about 2/3 of my tin of caramel). Top with the cheesecake mixture leaving about 1/2 cm space at the top for the chocolate. Refrigerate for at least 1 hour.
Heat cream in a small saucepan until small bubbles start to form around the edges (just before boiling point). Place chocolate in a glass or ceramic bowl and pour over cream. Whisk continuously until chocolate has melted. Allow to cool slightly and pour over cream cheese layer (I ended up with quite a bit of chocolate left over perhaps try 80g/80ml) and refrigerate for at least 4 hours or overnight.
Sorry, sorry, sorry I have been absent for so long. I was sick for a while and then was in Sydney for an appointment a visiting friends. Since I came home things have been difficult, depression has been nipping around my heels. Sapping my energy and making me lose interest in doing anything. I have so many things to blog about I hope that I can catch up.
I doubt that I am going to get through all of the remaining recipes in Sydney Food this year and to be honest I am not really all that worried about it now. I am getting to a point where I have made the majority of the recipes that I really want to and easily can. There are a few things that I just don't want to make, a couple of the seafood dishes. I have already said on numerous occasions that I am not keen on seafood and while I thought it would be good to make myself explore some new things I am now wondering if it is worth spending a bunch of money (seafood is expensive out here) on dishes that I am probably not going to enjoy. There is also one dish in the breakfast chapter that I have no desire to make, the jam doughnuts. I am not keen on doughnuts, I normally find them too fatty for me. I am not keen on the idea of deep frying. So I think I will leave that one as well.
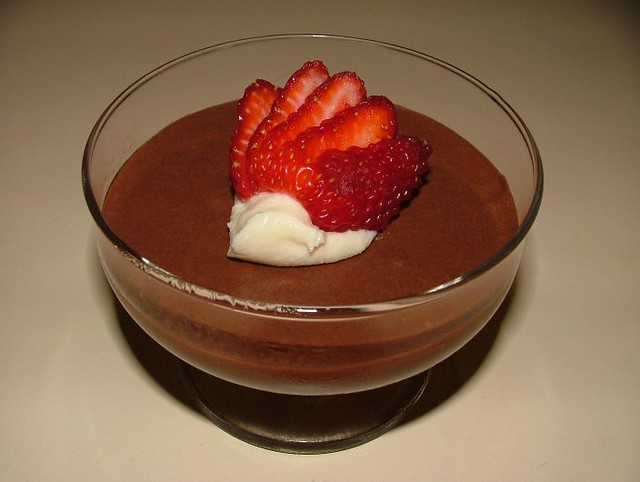
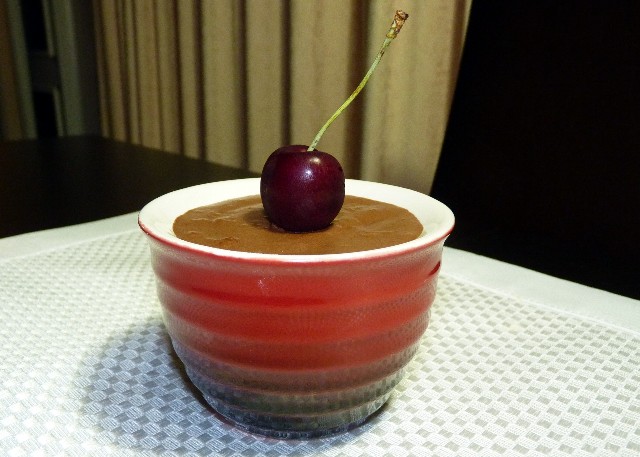
Now onto this recipe, the chocolate mousse. It was like pretty much any other chocolate mousse. Standard ingredients chocolate, cream, eggs. It was way, way too rich for me and gave me an upset stomach. In the October 2003 issue of Delicious magazine there was a recipe for a lower fat chocolate mousse. I have been making chocolate mousse using that recipe ever since. It is the recipe that I will post here as it is one I would definitely recommend trying as it is easy with a great taste but without all the fat.
Low-fat Chocolate Mousse
Serves 6 - 8
Ingredients:
200 g dark chocolate (I use Lindt 70%)
2 tsp powdered gelatine
50 ml boiling water
100 g low-fat ricotta
300 ml low-fat custard
2 tbsp brandy (I prefer 1 tbsp Kahlua)
3 egg whites
Method:
Melt chocolate over simmering water (or in microwave if preferred)
Add gelatine to boiling water and whisk until it has melted. Leave to cool slightly.
Combine ricotta & custard in a processor then add gelatine mixture.
Slowly stir in the melted chocolate and the Kahlua.
Beat egg whites to soft peaks and fold through chocolate mixture.
Divide between serving dishes and refrigerate until required.
I know that I have been absent for a couple of weeks. I really haven't been feeling tip-top of the past couple of weeks. I had a run in with a person at work and it shook me up a bit and my mood plummeted afterwards. I decided to take a bit of time out for some self-care where I cooked, slept, went to work and not much else. Oh, except for reading trashy romance novels on my new Kindle. I am starting to feel better now though so will have to get busy and post all the stuff that I have made over the past couple of weeks.
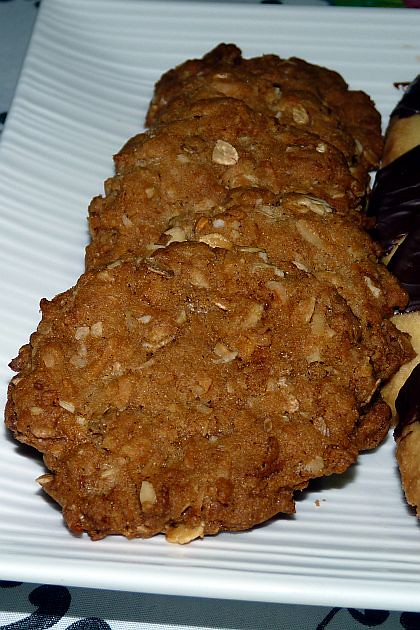
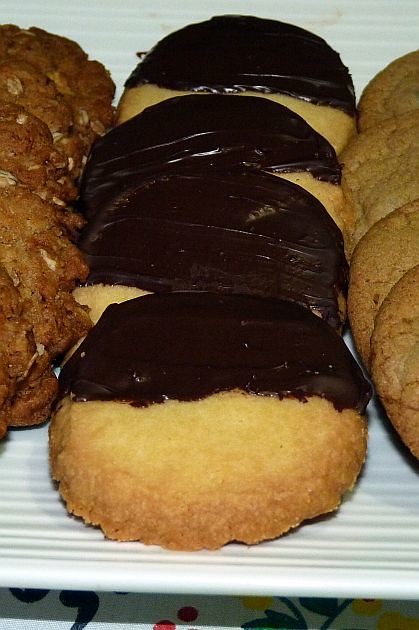
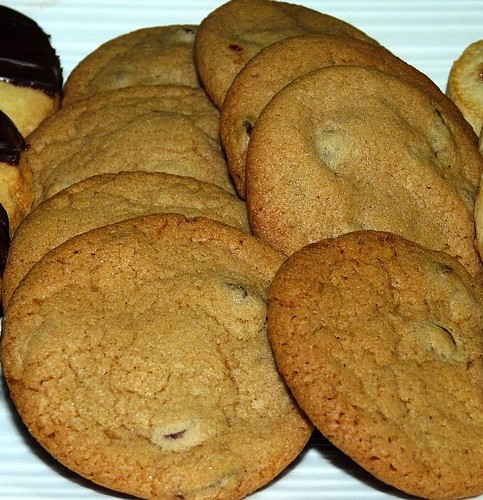
Happy Easter to all those out there. I find holidays a difficult time of year. This one even more so as it would have been my Mum's birthday today. I usually don't deal with these days well at all. Tend to just hide away a bit. Today, while hiding out, I decided that I would just do some baking. What better way than this to get through some of the multitude of sweet recipes in Bill's Sydney Food. So today I made half recipes of Chocolate Chip Cookies, Granny Mac's Shortbread, Chocolate-dipped Shortbread and Anzac Biscuits.
Anzac Biscuits
1 cup plain all-purpose flour
1 cup desiccated coconut (I only had shredded)
2/3 cup brown sugar
1 cup rolled oats (I used a combination of oats, barley & rye)
125g unsalted butter
1 tbsp golden syrup
1/2 tsp bicarb soda
2 tbsp boiling water
Method:
Preheat oven to 170C.
Place flour, coconut, sugar and oats in a bowl. Mix well.
Place butter and golden syrup in a saucepan over medium heat and melt.
Place bicarb soda in a small bowl and add hot water. Stir to combine. Add bicarb mixture to saucepan and stir. Pour over oat mixture and stir all ingredients together.
Roll teaspoon of biscuit mixture into balls and place on a greased and lined baking tray, leaving room for spreading. Flatten each ball gently with your palm.
Bake biscuits for 15 - 20 minutes or until biscuits are golden brown at the edges.
Chocolate-Dipped Shortbread
1/3 c (60 g) icing sugar
250 g unsalted butter, softened
1 tsp vanilla
1 1/2 c plain flour
1/2 c cornflour
125 g dark chocolate, in small pieces (I only has some choc chips which didn't work well)
Method:
Beat butter & icing sugar in a bowl until combined.
Add vanilla, flours & a pinch of salt and mix until a dough forms.
Form dough into a log with a 6 cm diameter and wrap in gladwrap.
Chill for 30 minutes.
Pre-heat oven to 180C
Slice dough into 1 cm rounds and place on lined trays.
Bake 20 - 25 minutes or until golden.
Cool completely.
Melt chocolate in a small pot and dip shortbread in so half of the biscuit is coated.
Leave to set.
Chocolate Chip Cookies
125g unsalted butter, softened
1 1/4 cup tightly packed brown sugar (I would use less, they are very sweet)
1 tsp vanilla
1 egg, lightly beaten
1 1/2 c plain flour
1/2 tsp baking powder
a pinch of salt
1/2 c chocolate bits
Method:
Preheat oven to 180C.
Beat butter and sugar until light and creamy.
Add vanilla and egg and stir to combine.
Stir in the sifted flour, baking powder and salt until just combined.
Fold through chocoate chips.
Place spoonfuls of cookie mixture on a lined baking tray.
Bake 15-20 minutes or until they turn pale gold.
Allow to cool on the tray for 15 minutes before placing biscuits on a wire rack to cool further. Makes 16 (I got 12 from half the recipe)
Granny Mac's Shortbread
2 c plain flour
1 tsp baking powder
1/2 c caster sugar
125 g butter, softened
1 egg, lightly beaten
1/3 c jam (I used homemade strawberry)
2 tsp cinnamon
Method:
Combine flour, baking powder & sugar.
Rub in butter until mixture resembles breadcrumbs.
Add 1 - 2 tbsp cold water and mix in, it should start to form a dough
Add egg and mix until you have a firm dough.
Roll out on a sheet of baking paper to for a 20 x 30 rectangle.
Spread with jam and sprinkle with cinnamon.
Roll up starting with the long side.
Wrap in gladwrap and chill for 30 minutes.
Preheat oven to 180C.
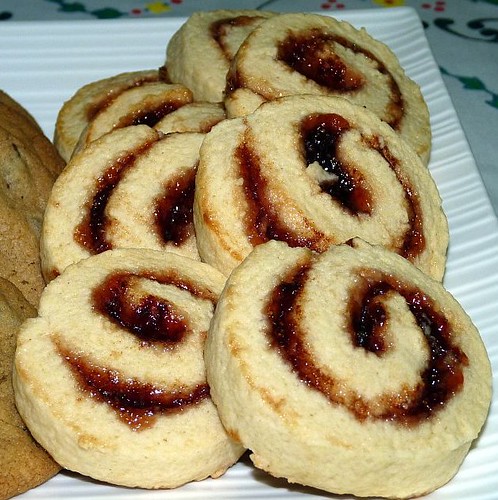
Slice dough into 1cm slices and bake for 15 - 20 minutes or until lightly browned.
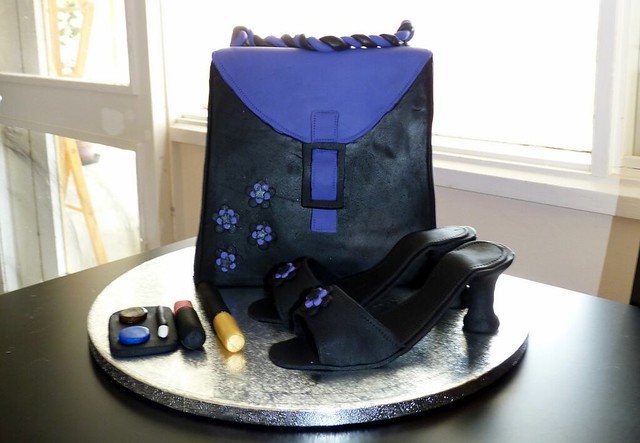
I did my first paid cake this past weekend. Yay! I was given carte blanche with it too which made it even better. It was for the 21st birthday of a lovely young woman that I know through work. I don't know her very well but know her enough to know that she loves shoes, bags, make up and the like so I decided to do a purse cake with a pair of shoes and some make up for decoration. I had wanted to make a pair of sunglasses too, but I couldn't find a template to use.
I purchased some midnight black fondant online, since it is so hard to colour your own black. I had a large amount of pink fondant left over from the carousel cake so I added some violet colour paste to turn it a lovely shade of purple. I added gum tragacanth to some of the black and purple fondant so that I could make the decorations. After waiting 24 hours for it to start to work I spent a lovely afternoon making a pair of shoes, mascara, lipstick, eye shadow palette, buckle & handle for the purse and flowers for decoration.
I made 2 x 23 cm square chocolate cakes using my perfect decorating cake. I trimmed each cake and cut them in half (to make 4 loaf-sized cakes) and stacked them filling each layer with ganache. I then trimmed the whole thing again creating an angle on the front. This was then covered with ganache and left to set overnight. Finally it was covered with fondant, black on the front with purple on the sides back and creating a flap on the front. Unfortunately, the handle that I made had not dried for long enough and collapsed when I placed it on the cake so I made a new one. At first I tried to drape it, but it started stretching so I just sat it on top of the bag. The flower decorations were stuck on the shoes and bag. An embossing tool was used to get the stitching detail.
It was such a fun thing to do. I just loved the whole process right from planning and searching flickr for ideas to the making and decorating. The birthday girl just loved the cake too however she did not cut it at her party on Saturday night but waiting until her actual birthday yesterday. It has also given me another possible 21st cake to do for an Enchanted Forest themed party...I hope I get the job.
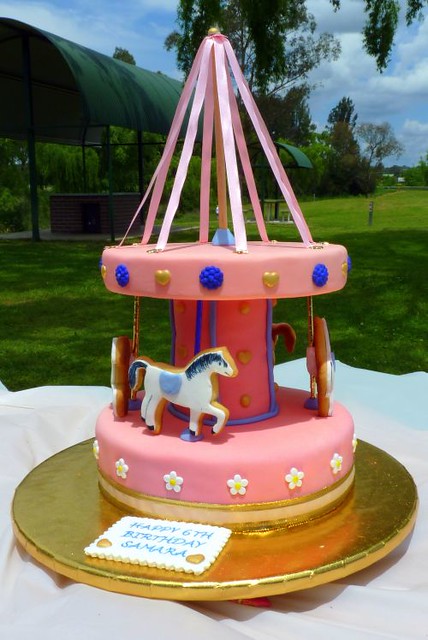
I thought that I would share my latest cake with you all. My best friend's daughter turned 6 last week and we had a lovely party on the weekend. She is horse crazy so this year I made a carousel cake for her. They cake is my standard chocolate cake which I have posted about before here. The horses are made from sugar cookies from over at Joy of Baking which were then covered with fondant. The mane, tail and hooves are done with Kopykate decorating pens. The flowers, hearts and dots were all made with gumpaste in a FMM Sugercraft mould and then painted. I purchased some pre-coloured pink fondant, however it was a bit bright so I mixed it out with some white fondant to tone it down a bit. I bought way too much so have a lot of pink fondant left over. I was unable to find the right cookie cutters here in Australia so got a set of horse cutters from the UK. The top layer is a foam dummy covered in fondant but everything else (excluding the ribbon) is edible. I placed the cake on lazy susan, which I got cheaply from Spotlight and I am sure that it will come in handy in the future, so that it could be turned. I had so much fun making it all the decorations and putting it altogether. The birthday girl was very excited and every one else loved it too. I hope to get some decorating work out of it.
Okay, so I promise I will get on with posting from the September delicious magazine recipes soon, hopefully tomorrow. However I just wanted to post a couple of my latest cake creations. I just love cake decorating. I am quite happy to spend hours baking and decorating cakes. I would love to advertise and get paid for doing it but from what I understand I would need to apply for development approval to operate a business from home. I also understand in this situation you would also need to get you kitchen passed for health and safety. While I am sure I probably could do all that, it would involve a lot of application fees and all other associated costs and then you have the possibility of a neighbour objecting to the application and all that money going down the drain. The other thing that stops me is that cake decorating is a time consuming and, to be honest, pricey venture. There are a lot of associated costs and when you live in a country town I don't think that you can charge what cakes are worth. So with all of that in mind I will just continue to make cakes for family and friends and leave it at that.
Over the last month I have had the chance to do two cakes, the first for my grandmother's 80th birthday and the second for a friend's daughter's 3rd birthday. For both of these cakes I made my stock standard chocolate cake. It is a wonderful recipe and makes the perfect cake for decorating without all the expense of a mud cake. The secret ingredient to this cake is the yoghurt. I have made it with sour milk and it is lovely but too light for decorating. I have made it with sour cream and the extra fat in the sour cream is too much for the cake. Yoghurt is just perfect for getting the density that is required for cake decorating. I even use this recipe for tiered cakes. Covered in either buttercream or ganache and fondant it is terrific, although I have to admit that I am partial to buttercream. The recipe handles being doubled and tripled without a problem. I do tend to use a lily nail in the centre in large deep pans though. I have had the occasional problem with lopsided rising, however I think that was due to my previous oven as I have had no such problems with my current oven. It is my most requested cake and is always highly praised by everyone who tries it, even my yoghurt hating uncle loves it.
Chocolate Cake
Ingredients:
125 g (1/2 c.) very soft butter
1 1/4 c. sugar
2 eggs
2 tsp vanilla
1 2/3 c. plain flour
2 tsp baking powder
1 1/2 tsp baking soda
3/4 tsp salt
2/3 c. cocoa
1 1/2 c. sour milk or plain yoghurt
Method:
Pre-heat oven to 180 C
Place all ingredients into mixing bowl.
Beat on a low speed until combined, approximately 2 – 3 minutes.
The beat on high speed for 10 minutes.
Pour mixture into a greased 24 cm round springform tin or bundt pan.
Bake for 30 to 45 minutes or until a skewer comes out clean.
Cool in the tin for 5 minutes and then turn out.
For my grandmother's 80th birthday cake, I did a double mix in a 24 cm square pan and then did a second tier of an 18 cm square pan which used 2/3 of a mix (I made cupcakes from the rest). I had to trim a little bit but not too much. I coated it with white buttercream, which was very soft as it was very rainy at the time, and then had strawberries dipped in dark chocolate and then drizzled with white chocolate. My grandmother loved it and I was pretty happy with it too.
For the 3-yr-old's birthday cake I decided to do a castle cake. I made a 18 cm and 10 cm square cakes from one mix and also made a slab cake from another mix to use for the towers. I cut the towers out using a pastry cutter and put buttercream between the layers and secured with a skewer down the middle. I also used skewers to secure the towers to the cake. Covered the whole lot in pink buttercream, the top of the towers are made from mini ice cream cones iced with buttercream and then rolled in sprinkles, and used fondant for the accents. I also covered the cake board with green tinted fondant. All of the little girls at the party were so excited by the cake. They just loved it. I also made a royal icing tiara to go on top of the cake, but I don't have a picture of it. I also got some little "princesses" from the bakery aisle at the supermarket and put them on for decoration. I was very pleased with how it turned out.